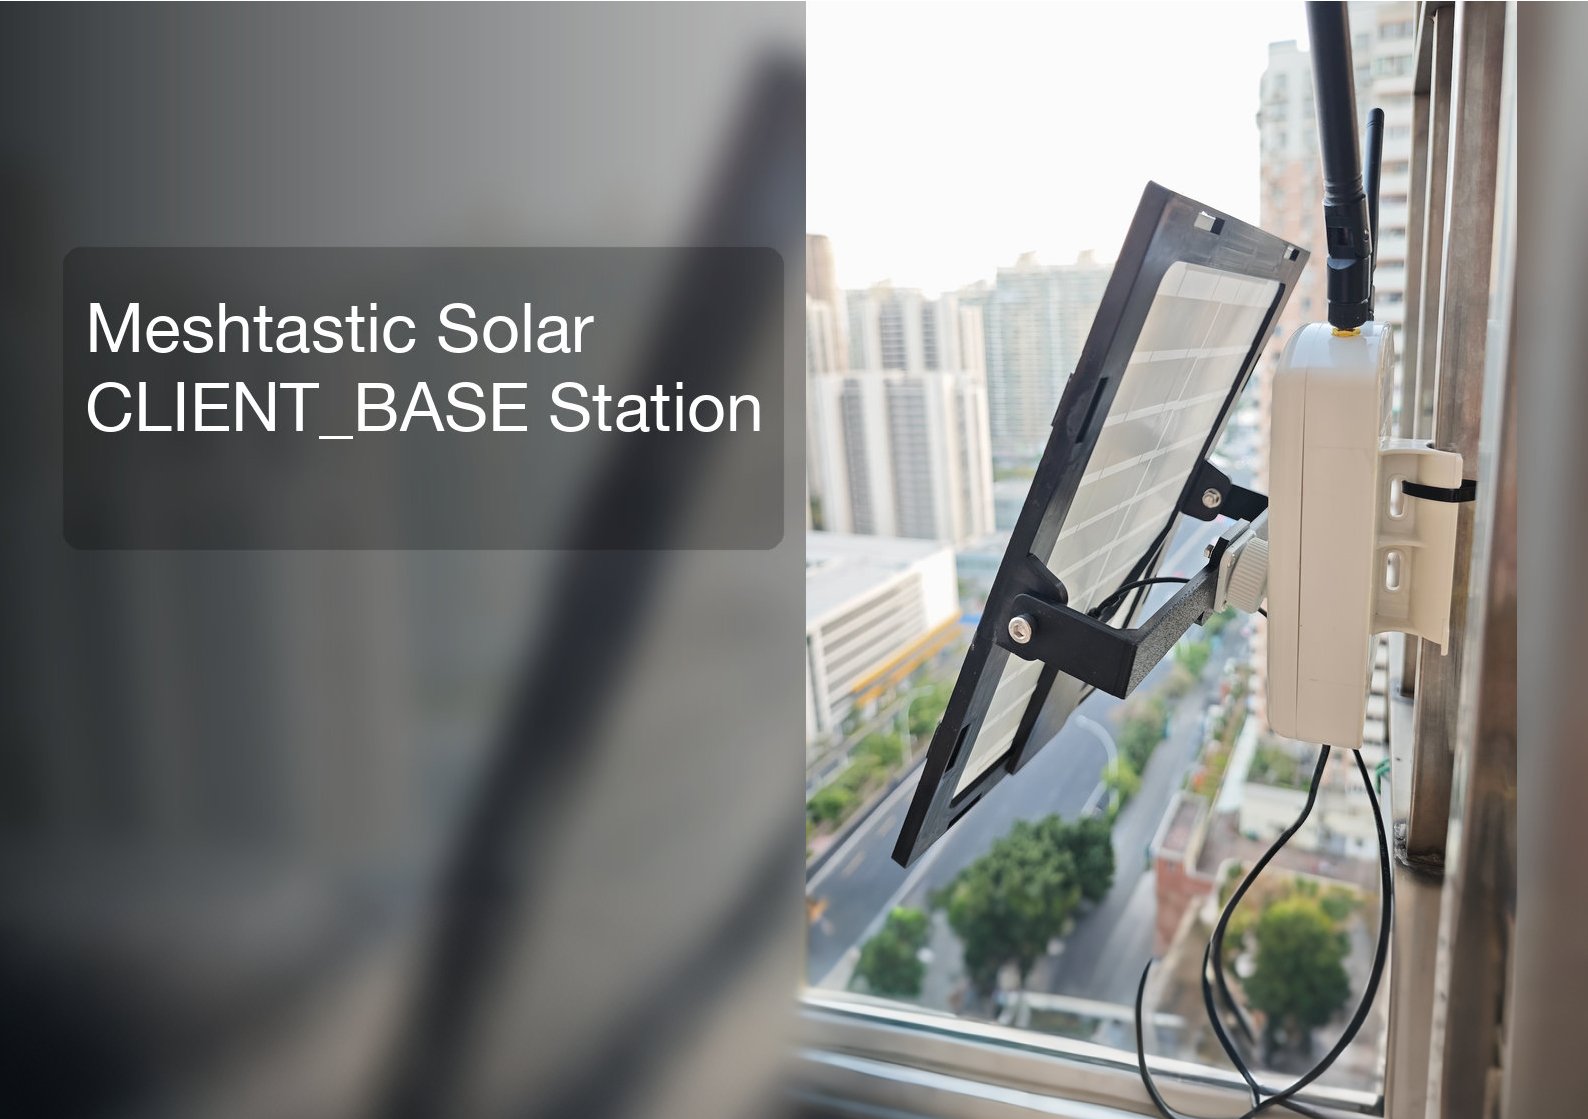
In Part 1, we built Meshtastic nodes from custom made boards. Now in Part 2, we’ll turn one node into a permanent, always-on CLIENT_BASE station powered by solar, mounted outdoors on my balcony. This base station will act as the backbone of my local Meshtastic network, while the second node will be a portable tracker/handheld radio for positioning and communication.
What Is a CLIENT_BASE Station?
A CLIENT_BASE station is a specialized meshtastic role for nodes that are typically connected to a permanent power source, such as a USB wall charger or a large solar array. Unlike the standard CLIENT role, which aggressively uses “light sleep” modes to preserve small batteries, a CLIENT_BASE node remains awake, and high-responsive state at all times. This eliminates the slight latency in waking up the processor to handle incoming packets, making the node more reliable for monitoring a local mesh. Because power consumption is not a primary concern, the screen timeout is usually extended or disabled, allowing the device to act as a persistent desktop dashboard or “base station” that displays real-time messages and sensor data, such as the readings from the telemetry sensors like BME280. A CLIENT_BASE station functions similarly to a standard CLIENT station on the mesh, but its constant availability ensures it is always ready to bridge communications between the phone and the wider network without the power-saving delays which is typical of handheld devices. This means:
- Near-zero latency for incoming messages
- Better mesh bridging between your phone and the wider network
- Persistent display for real-time messages, telemetry, and sensor data (like BME280)
- Perfect for 24/7 environmental monitoring and mesh relay
As a result, it’s the ideal role for a solar-powered outdoor base station.
Full System Overview
This build creates a weatherproof, solar-powered Meshtastic base station that lives outdoors. It connects to a solar panel, maintains reliable mesh coverage, and requires almost no maintenance.
System Structure
- Meshtastic Core Board: Runs the mesh network and handles radio communication
- MPPT Solar Charge Controller: Maximizes power from the solar panel
- Battery: 18650 cell for overnight and low-light backup
- Waterproof Enclosure: Protects all electronics outdoors
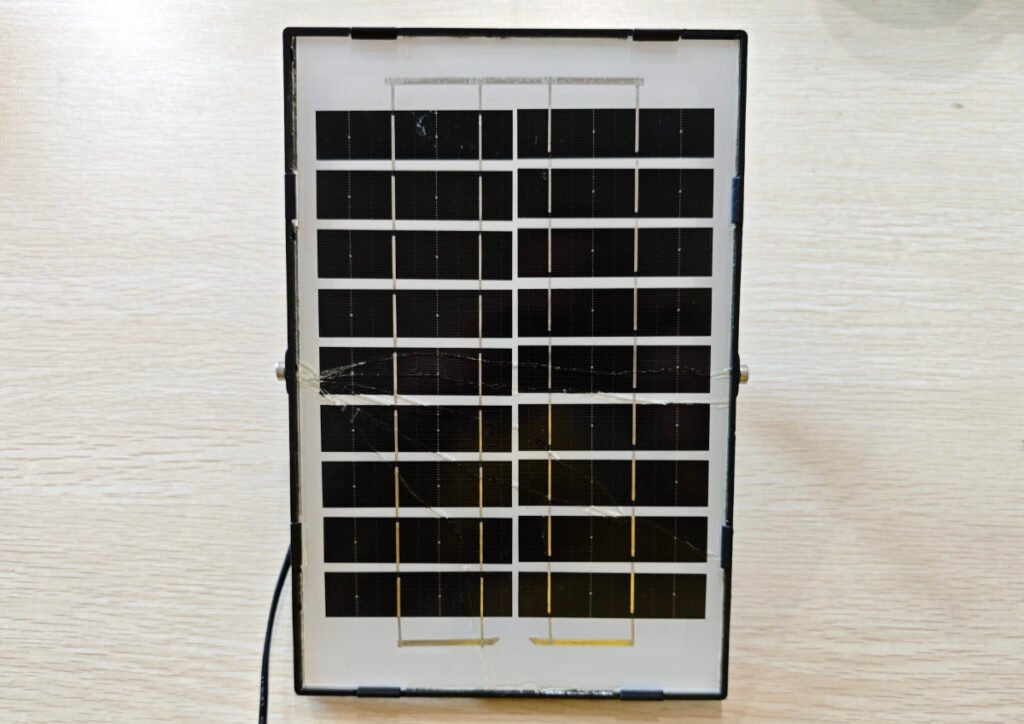
- Solar Panel: Provides clean, renewable power, a 9V/6W panel used in my project
- Antennas: LoRa for mesh + Wi‑Fi for configuration
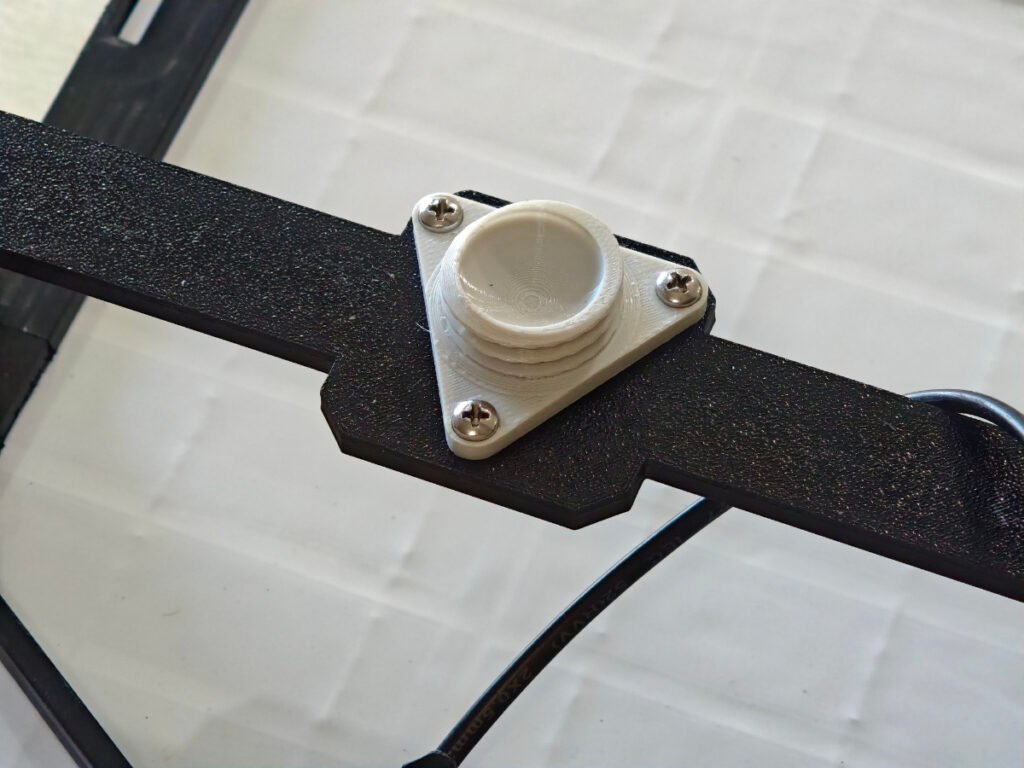
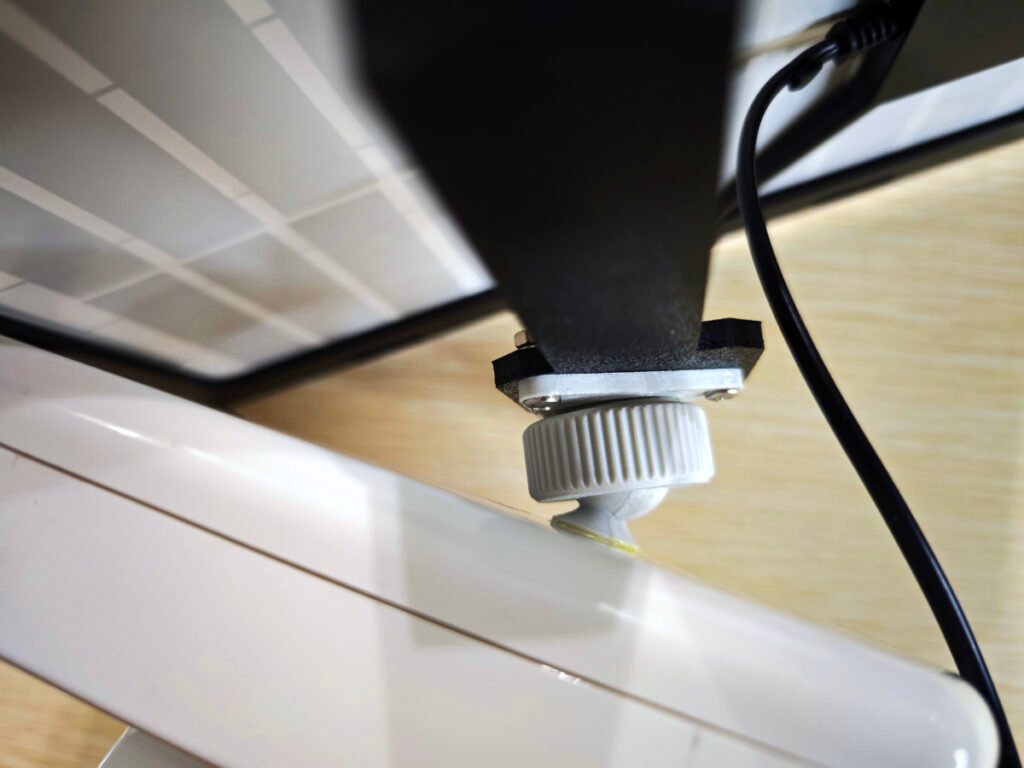
- 3D‑Printed Mounts: Ball joint for adjusting the solar panel angle
Parts & Components You Need
To build your own CLIENT_BASE station, gather these parts:
Core Electronics
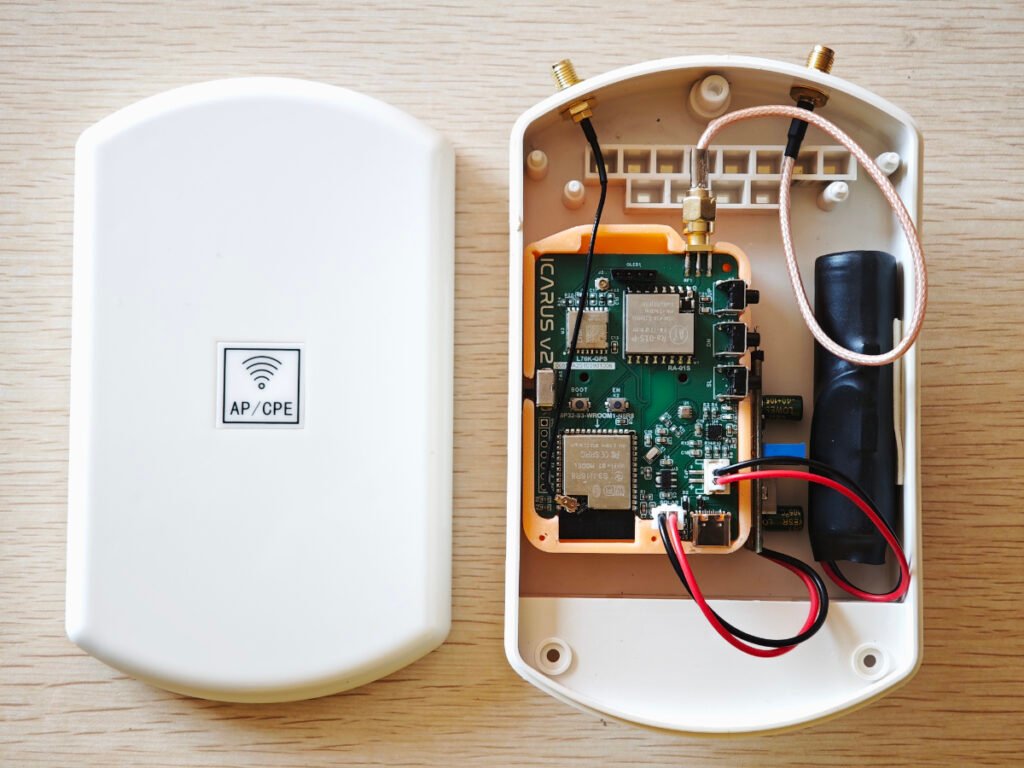
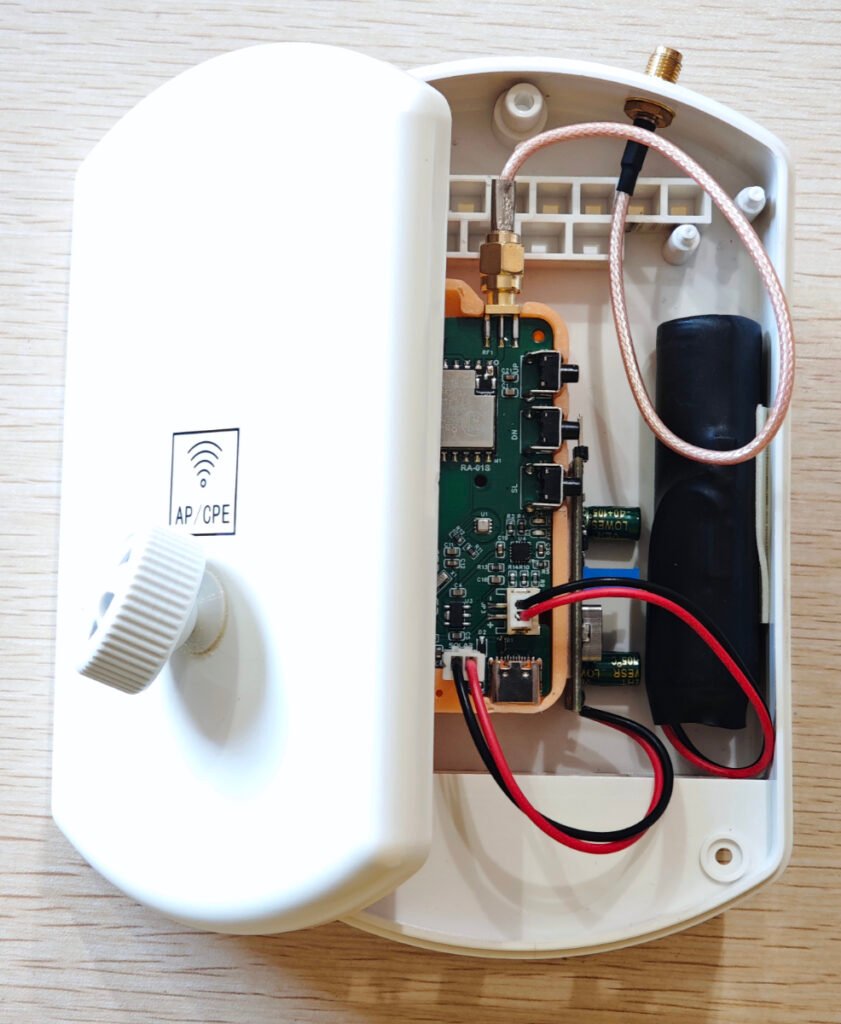
- Meshtastic-compatible board (I used ICARUS V2 + RA‑01S LoRa module)
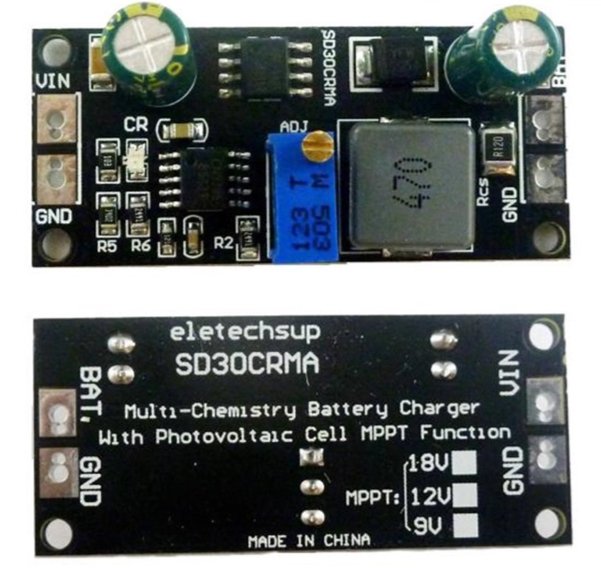
- SD30CRMA MPPT solar charge controller (critical for maximum solar efficiency)
- One cell of 18650 lithium battery or more
- A 9V/6W solar panel, you could use higher power ones
Hardware & Enclosure
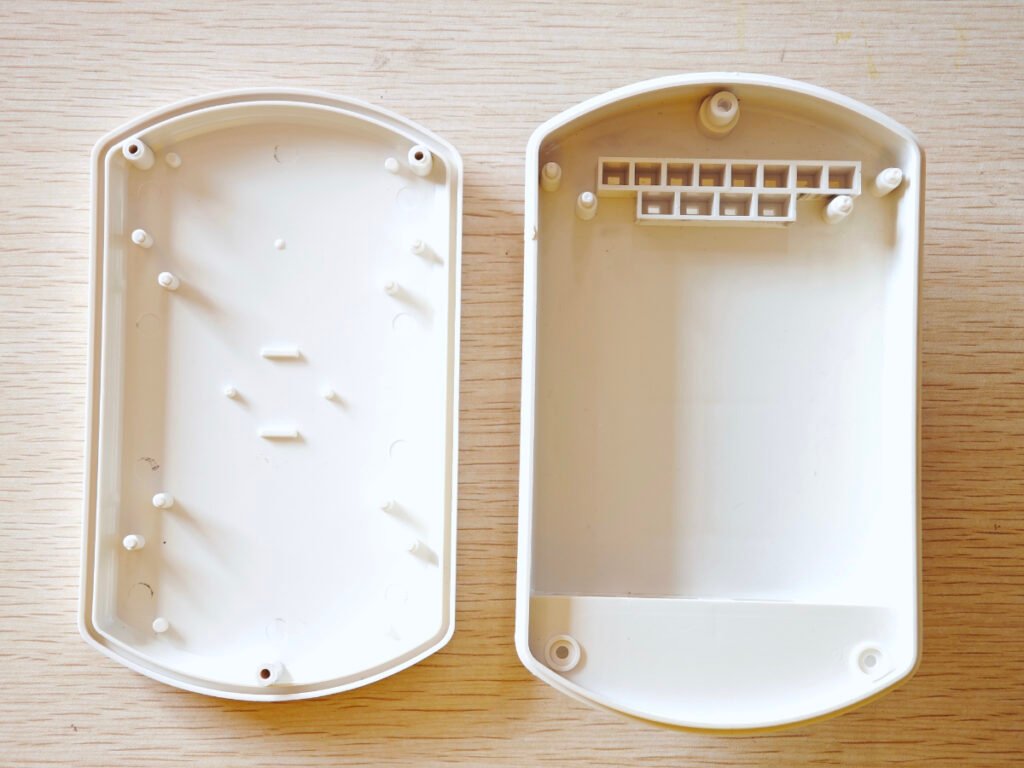
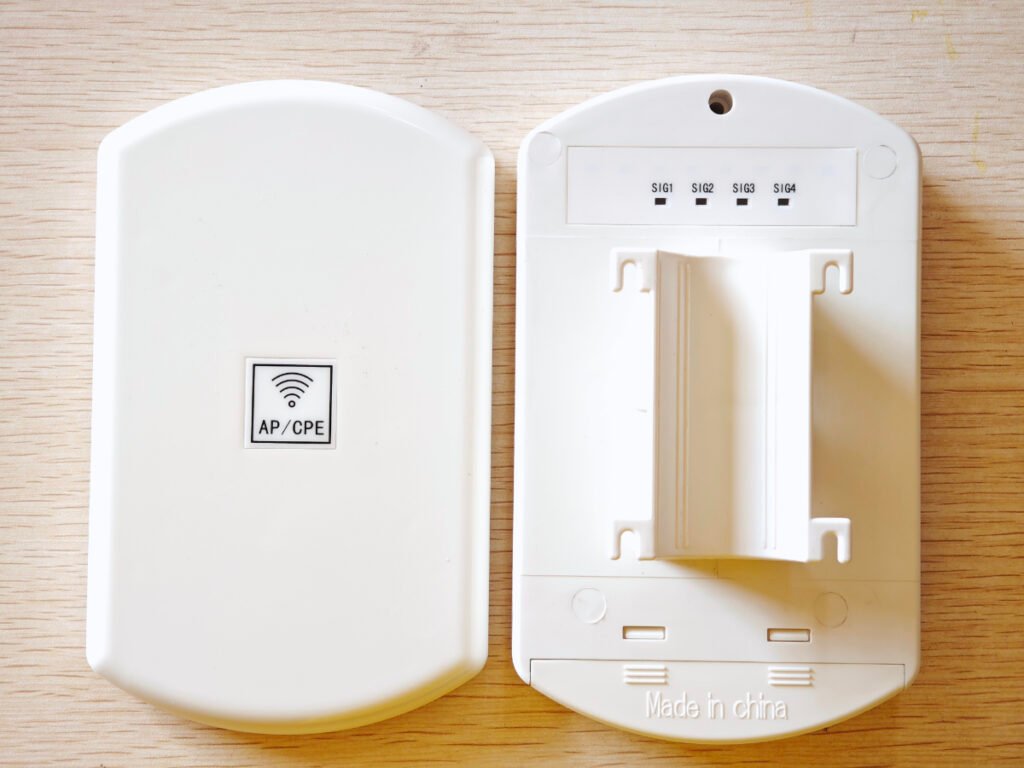
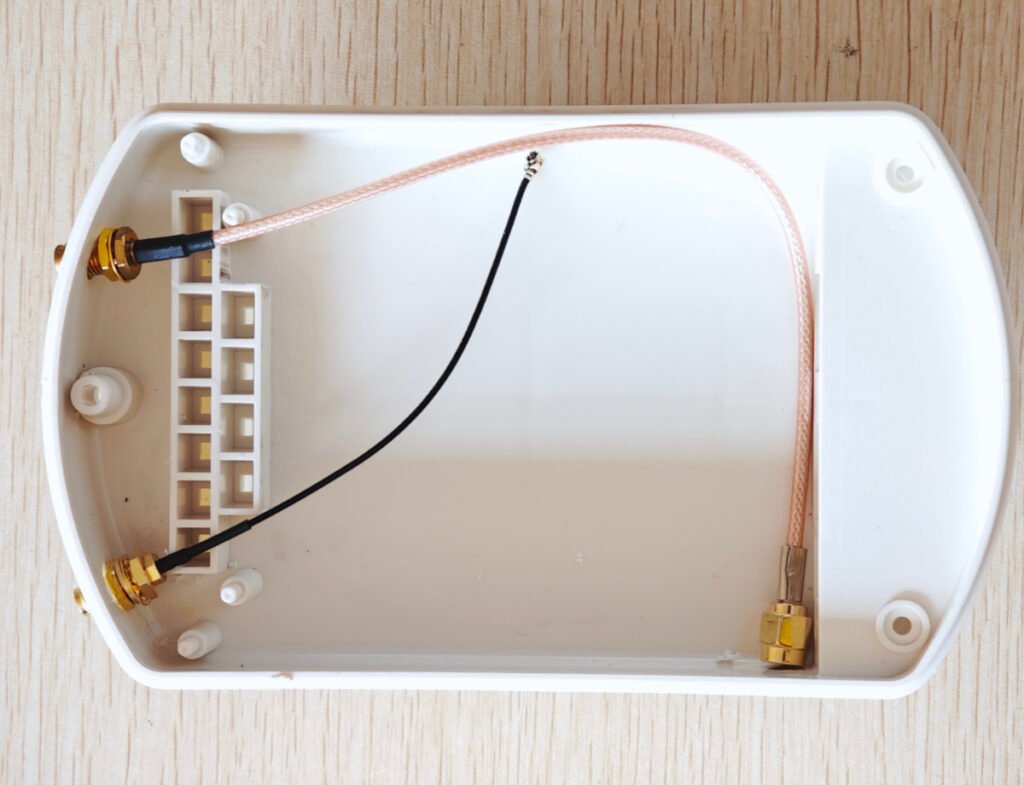
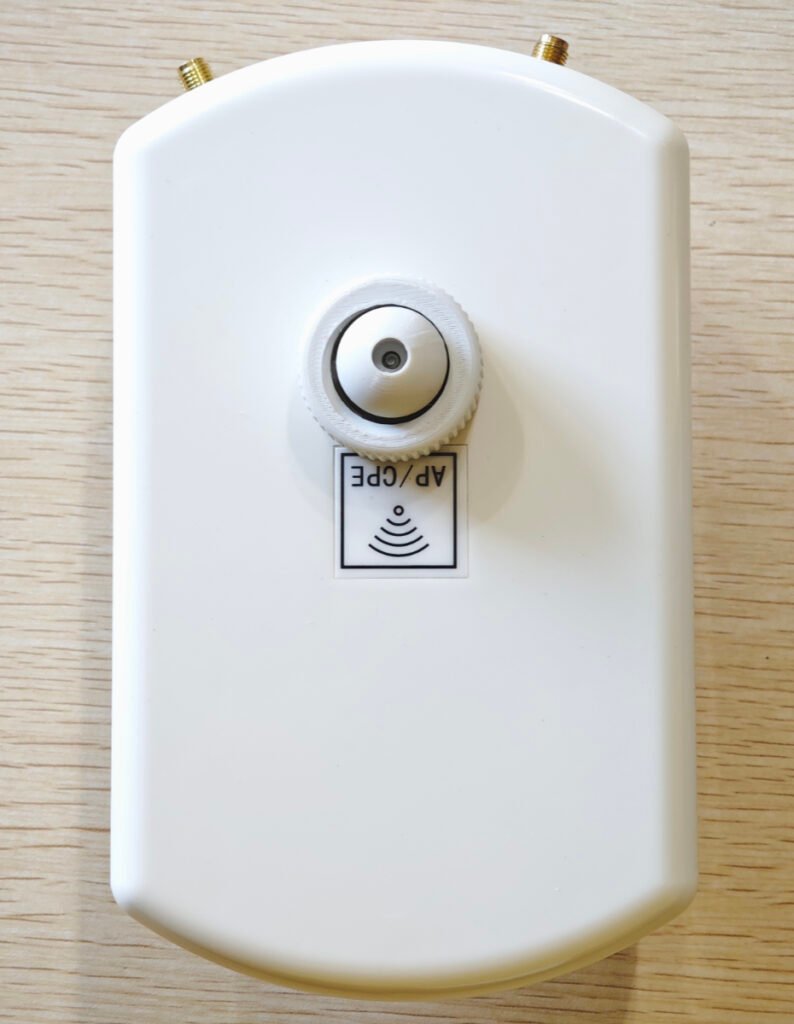
- Waterproof AP/CPE plastic enclosure (outdoor‑rated)
- LoRa antenna + Wi‑Fi antenna (if your board supports Wi‑Fi)
- 3D‑printed ball joint (for solar panel angle adjustment)
- Screws, cables, and heat‑shrink tubing
- Mounting bracket for balcony railing
Step-by-Step Build Guide
1. Prepare the Waterproof Enclosure
The AP/CPE enclosure is perfect for outdoor use. I drilled two holes:
- One for the LoRa antenna
- One for the Wi‑Fi antenna
2. Install the MPPT Charge Controller
The SD30CRMA module supports MPPT (Maximum Power Point Tracking), which pulls the most power possible from your solar panel.
- Connect the MPPT output to the solar input on the Meshtastic board
- Connect the 18650 battery to the battery port on the Meshtastic board
- The MPPT input will later connect to the solar panel
3. Assemble All Components Inside
Place everything neatly into the enclosure:
- Meshtastic mainboard
- 18650 battery
- MPPT controller
- Double face foam tape for keeping the board in position
Double-check wiring for short circuits before closing the case.
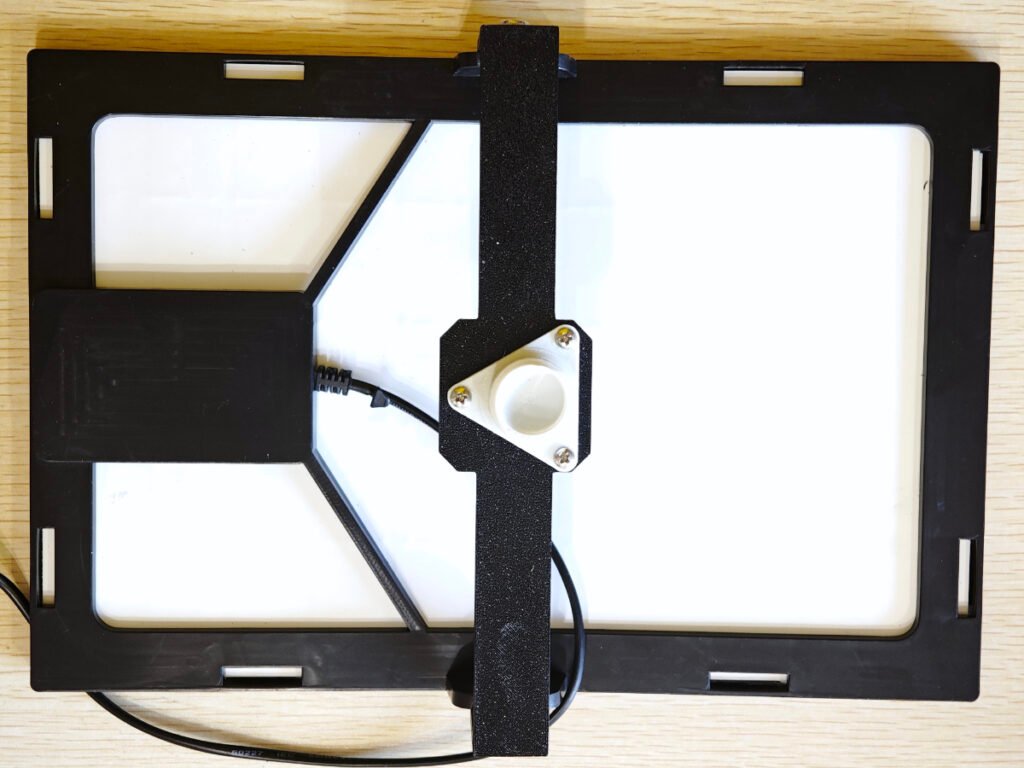
4. Attach the Solar Panel with 3D‑Printed Ball Joint
To get the best sun exposure:
- Mount one half of the ball joint on the enclosure top (using self-taping screws)
- Mount the other half on the solar panel bracket
- Attach the 9V/6W solar panel
The ball joint lets you easily adjust the panel angle for maximum sunlight.
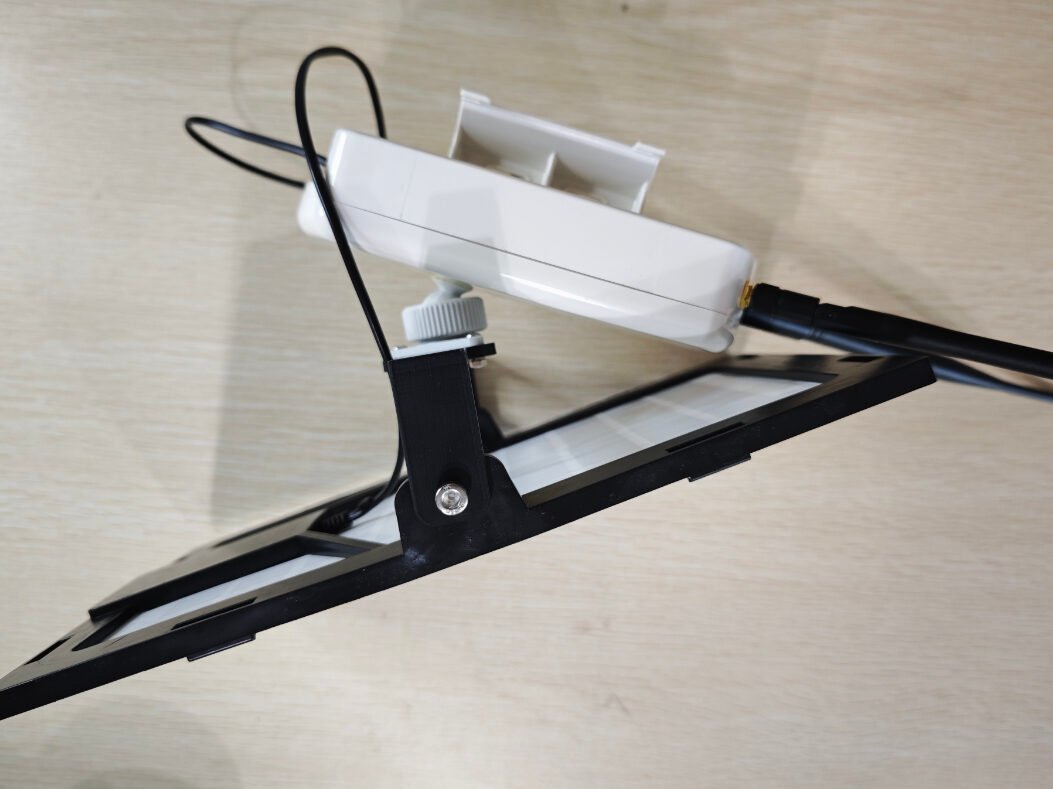
5. Mount the CLIENT_BASE Station on the Balcony
Install the fully assembled unit on the balcony railing. The solar panel faces to the sun, and the antennas point outward for better range.
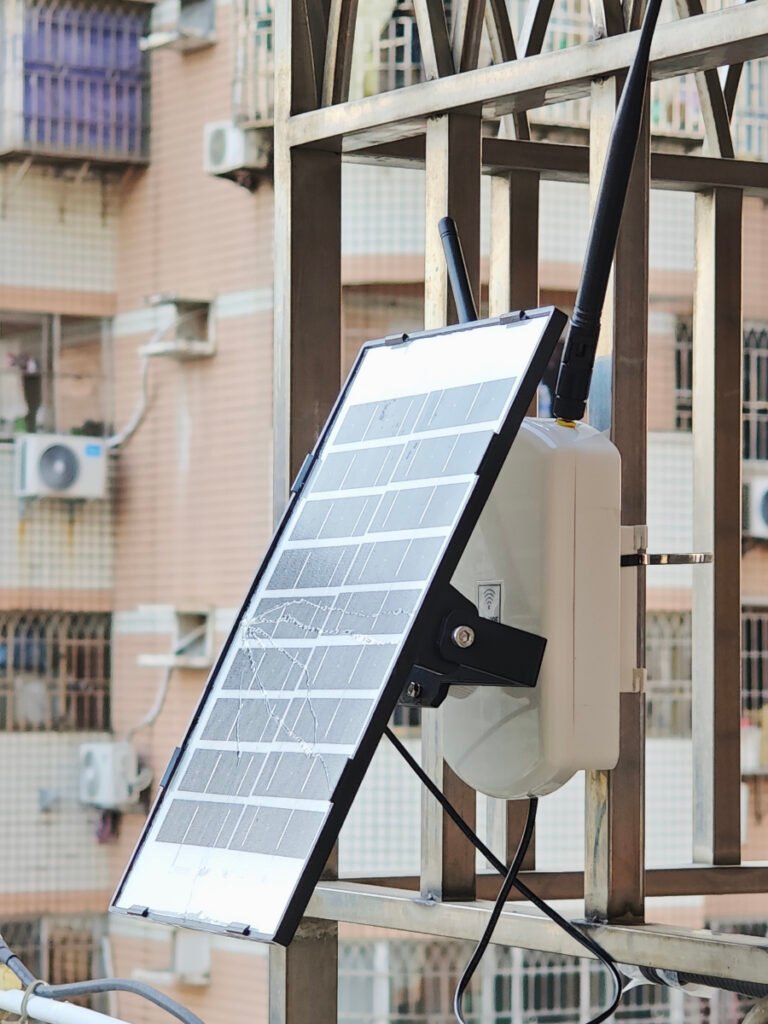
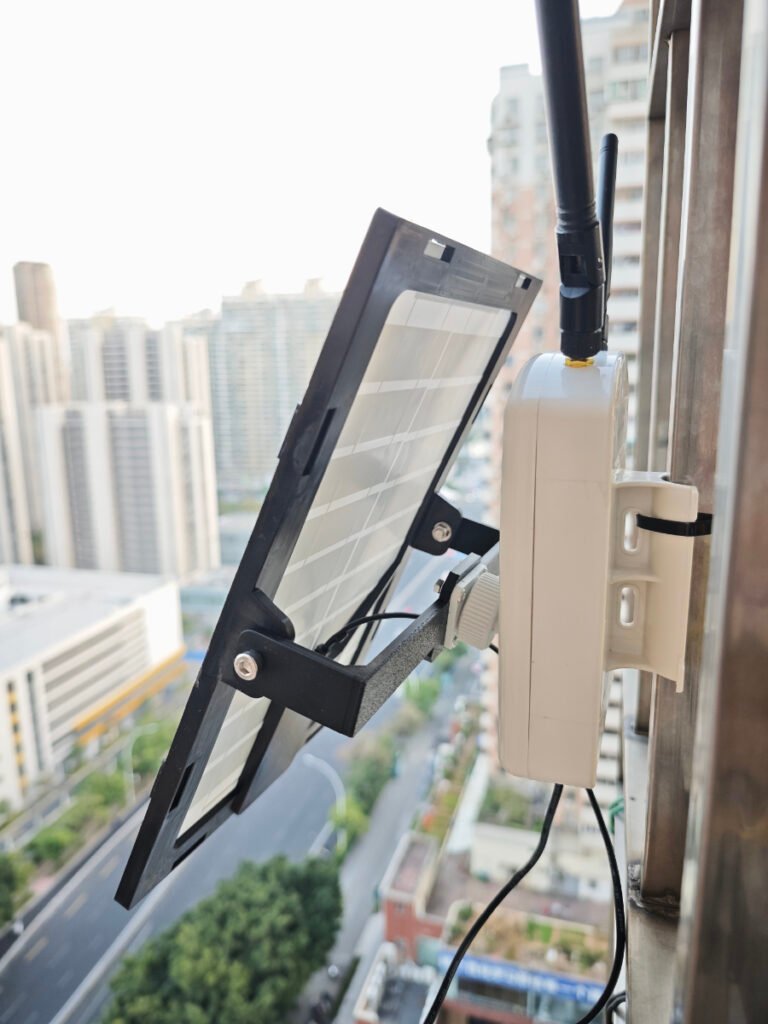
Final Result
The solar-powered Meshtastic CLIENT_BASE station is now:
- Weatherproof
- Always online
- Self‑powered via solar
- Low‑latency and highly reliable
- Mounted permanently outdoors
It serves as the main hub for my handheld tracker node, creating a stable, private off-grid communication system.