
**Disclosure**: This article is a deep-dive review of the open-source JingShi desktop clock project by zhushengji. We believe in supporting the maker community by bringing hidden gems like this beautifully designed ESP32 timepiece to a global audience.
Overview
This article reviews the open-source JingShi (Quiet Stone) desktop clock, an ESP32-powered project designed by zhushengji. It explores the clock’s core features, hardware design, build difficulty, open-source value, and why it’s perfect for us makers who love building things and learning new tech. It’s a sleek, simple clock that’s way smarter than it looks—ideal for your workspace.
Why Makers Crave a DIY Desktop Clock?
For makers and desk setup enthusiasts, a basic desktop clock telling time just doesn’t satisfy us. We want a project that teaches, challenges, and reflects our creativity. Traditional digital clocks are passive—you unbox them, plug them in, and that’s it. No learning, no tweaking, no personality. The JingShi (Quiet Stone) desktop clock solves this by being more than a timepiece—it’s a hands-on learning journey wrapped in a minimalist, functional design. Built around the ESP32 with a 3.12-inch OLED display, smart sensors, and smooth animations, it’s a project that lets you practice soldering, sensor integration, and ESP32 programming while creating something you’ll use every day. At approximately $17 (CNY120) to replicate, it’s accessible for makers of all skill levels—perfect for anyone who finds joy in building, not just buying. Ready-made ones can’t offer that: the satisfaction of soldering your first sensor, the thrill of customizing the OLED interface, or the pride of using a device you built with your own hands. Based on these facts, the JingShi (Quiet Stone) desktop clock is ideal for makers seeking a custom smart desk accessory.
What Makes the JingShi Desktop Clock Stand Out?
Built around the ESP32 microcontroller and a high-resolution OLED display, the JingShi clock is far more than a basic timepiece—it’s a compact smart device with maker-centric features. Unlike traditional clocks, this open-source project offers full customization, smooth visuals, and sensors that add real utility.
Technical Insight: ESP32 – The Core
As an experienced maker, I find the ESP32 perfect for the project in this kind. Its dual-core processing, built-in WiFi/Bluetooth, and ample GPIO pins handle all features effortlessly—from driving the clock’s display content to processing sensor data and OTA updates. A small tweak for future iterations: leveraging the ESP32’s low-power modes to extend battery life for offline use. The RTX8025 RTC chip is also a smart choice, ensuring precise timekeeping even in sleep mode.
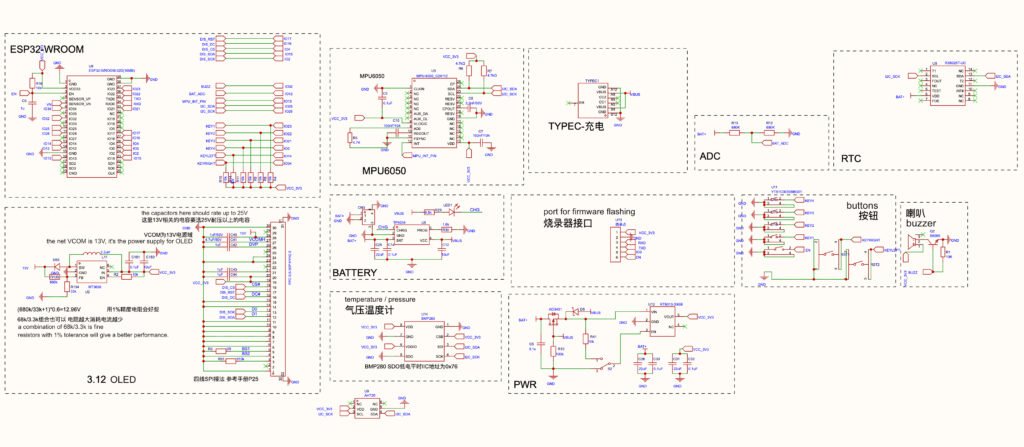
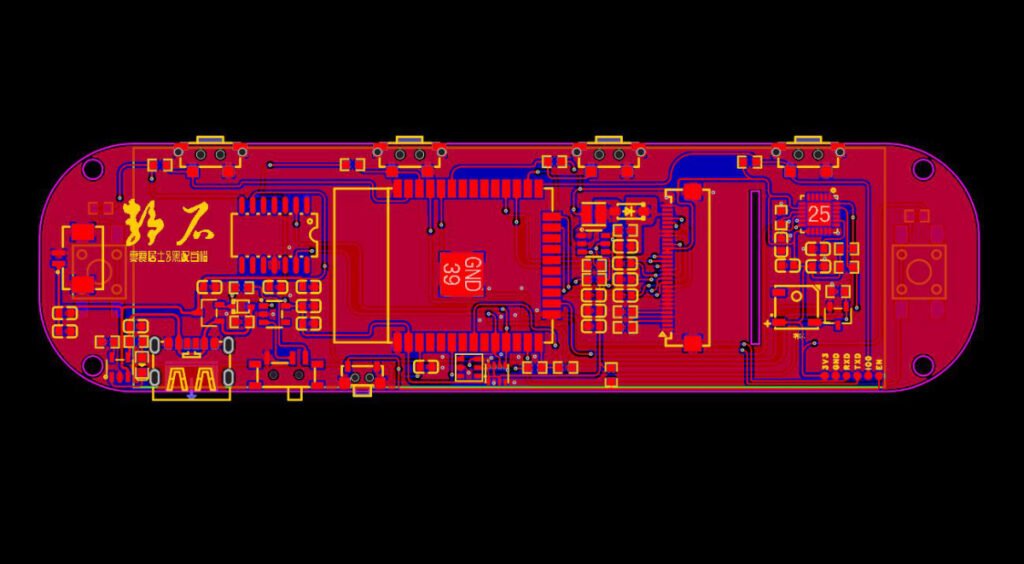
Hardware Deep Dive: Curated for Performance
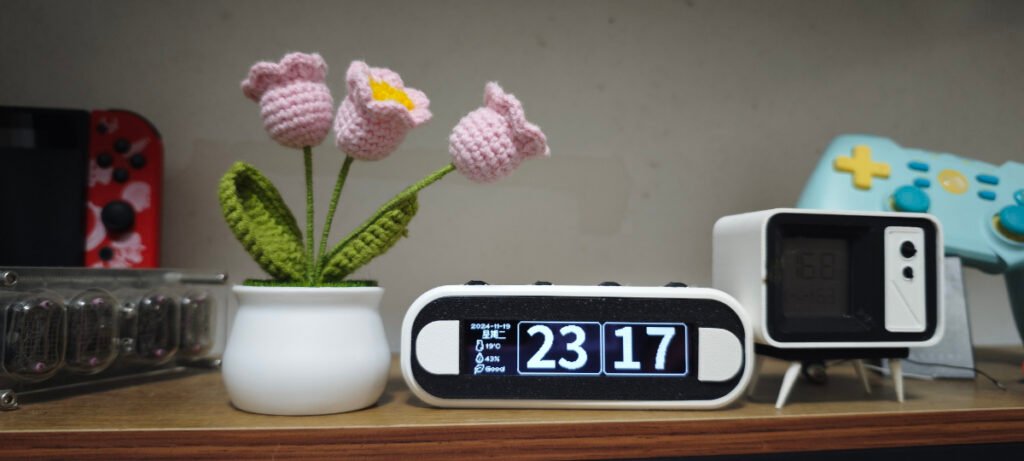
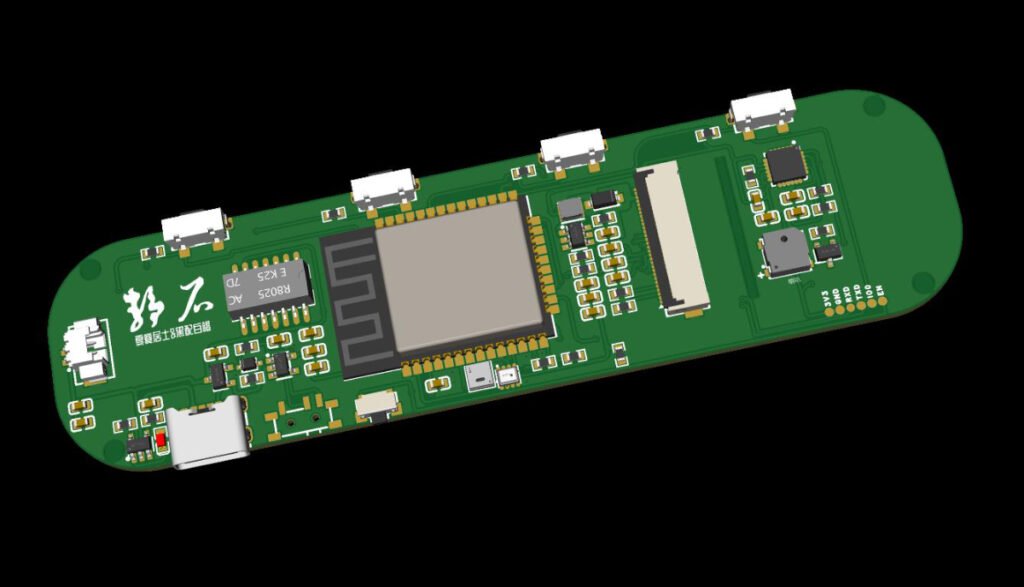
The author (zhushengji) uses affordable, easy-to-source components for a compact, sleek design. Its centerpiece is a 3.12-inch SSD1362 OLED display (256*64 resolution) for crisp visuals and animations. Core components include the ESP32, a suite of sensors (MPU6050 for vibration wake-up, BMP280 for pressure/temp, AHT20 for humidity, RTX8025 for RTC), 6 physical buttons, a buzzer, and an 802095 lithium battery as the source of power.
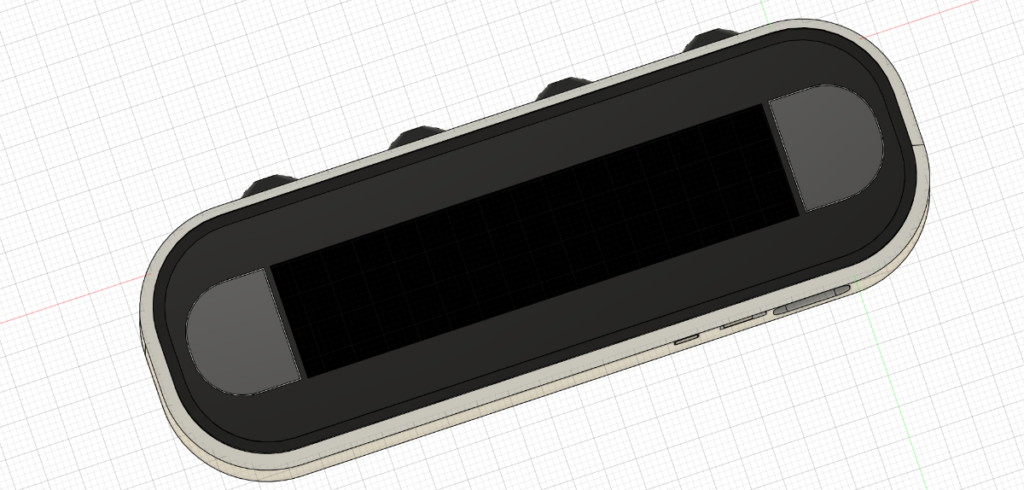
Maker-friendly features include 3D-printable enclosure STLs, an i2c bus scan firmware (WireScan.bin) to troubleshoot soldering, and pre-built firmware (beta_Version.bin) for easy flashing—perfect for beginners.
Build Difficulty: Is This Project Right for You?
- Difficulty Level: Intermediate (basic SMD soldering for resistors, capacitors, and sensor ICs; through-hole for buttons—no advanced skills needed).
- Software Setup: Medium (pre-built firmware available for beginners; open-source code for advanced makers).
- Build Time: Approx. 4-6 hours (3D-printing takes the most time).
Core Features:
- Smooth OLED animations and page-flipping.
- Precision timekeeping (WiFi auto-calibration + manual options, RTX8025 RTC).
- Capable of weather (WiFi) + offline prediction.
- Temp/humidity/pressure monitoring via BMP280 and AHT20 sensors.
- Vibration wake-up (MPU6050) and adjustable auto-dimming for battery-saving.
- Alarm and Pomodoro timer.
- OTA updates and 3D-printable enclosure.
Open-Source Value: Customize and Innovate
Licensed under GPL 3.0, all design files, firmware, and code are free on OSHWHub and GitHub. Beginners can learn ESP32 programming and sensor integration, while advanced makers can add features like Bluetooth or custom OLED interfaces.
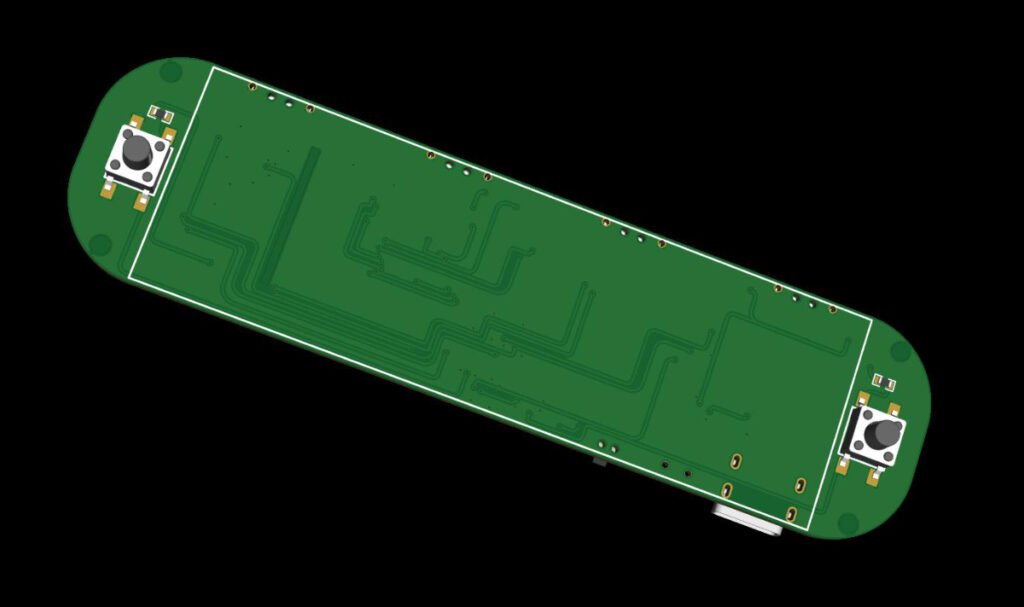
Buttons Explained:

- There are four buttons on the top (Button-1, Button-2, Button-3, Button-4) and two buttons on the front panel (Left-Button, Right-Button).
- Button-1 and Button-2 serve as navigation; Button-3 is for confirmation, and Button-4 is for return.
- Long-press Button-4 after waking up to enter the main menu.
- Press the Left-Button after waking up to access the timer; tap it again to pause the timing, and press Button-4 to exit the timer interface.
- Press the Right-Button after waking up to enter the Pomodoro Timer mode: within 5 seconds, press the Left-Button to add 1 minute, or press the Right-Button to add 5 minutes. If no operation is performed within 5 seconds, the Pomodoro timing will start automatically.
- For viewing the real-time weather information or accessing the NTP time calibration feature, an Internet connection is required. The device will automatically connect to the last used WiFi access point; if the connection fails, it will enter the automatic network configuration mode.
- In the network configuration process, the device will automatically scan the surrounding 2.4G Wi-Fi networks. Later, a notification will be shown on the OLED. Next, use your phone or computer to scan your local WiFi network and connect to the network named “Jingshi Network Configuration Wi-Fi” to enter the configuration page. From the page, choose your home Wi-Fi name and input the WiFi passcode to complete the network configuration. The third field on the page, is for the Seniverse Weather API key, which is used to retrieve weather data. You can go to the webpage (https://www.seniverse.com/) to apply for a free personal key. Fill the API key in the field, but it is optional if you do not wish to use the weather forecast feature.
The Final Word
The JingShi desktop clock is a must-build project for makers and desk enthusiasts. It’s affordable, functional, and stylish—blending ESP32 with sensors, and an OLED display. Whether you’re a beginner honing skills or an advanced maker customizing a smart accessory, it meets all. If you’ve built it or have optimization ideas, share your experience in the comments!
Project Link: https://oshwhub.com/zhushengji/jing-shi-_-zhuo-mian-shi-zhong
Github Link: https://github.com/zhushengji/3.12OLED_Smooth_animated_smart_alarm-clock/tree/main
**Copyright Notice**: This article is an original review of the JingShi Desktop Clock project designed by zhushengji (original project: https://oshwhub.com/zhushengji/jing-shi-_-zhuo-mian-shi-zhong). The original project is licensed under GPL 3.0. All images used are credited to zhushengji without modifications.