Compiling Tasmota Used to Be a Chore?—Not Anymore
If you’re into smart home DIY and own Sonoff switches, ESP8266, or ESP32 boards, you already know Tasmota is a superpower of home automation. It turns cheap hardware into fully customizable smart devices, way better than clunky factory firmware. But let’s be honest: customizing Tasmota firmware is a total headache. Want to strip out unused features to make the binary file smaller? Pre-load your Wi-Fi info so your device connects right away? Lock in MQTT settings before flashing? These are must-haves for tailored ESP32 Tasmota firmware and ESP8266 Tasmota firmware, but the old way made it way harder than it needed to be.
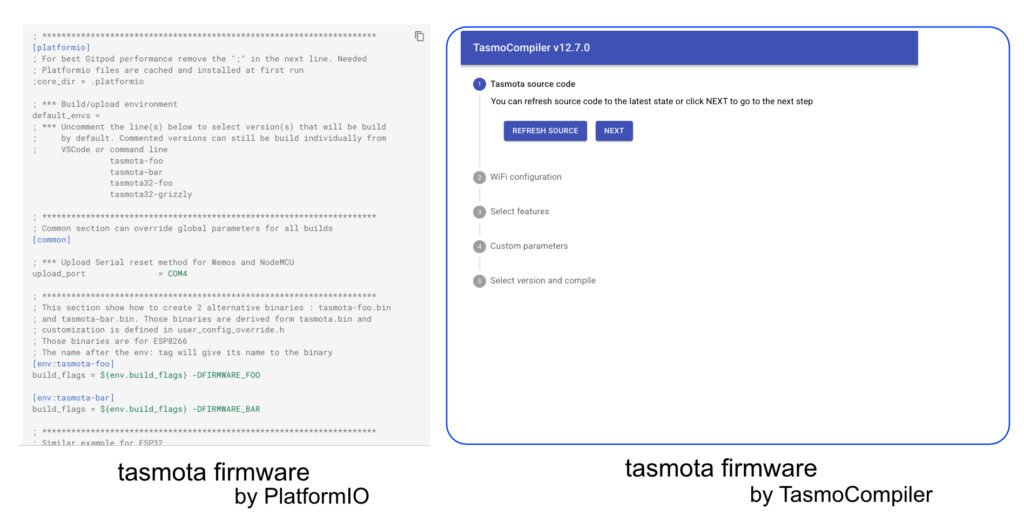
You used to have to fire up VS Code, install PlatformIO, hunt for config lines, fix dependency errors, and wait forever for compiling. Half the time, you’d spend an entire afternoon just troubleshooting instead of building. It’s not that it’s impossible—it’s just annoying.
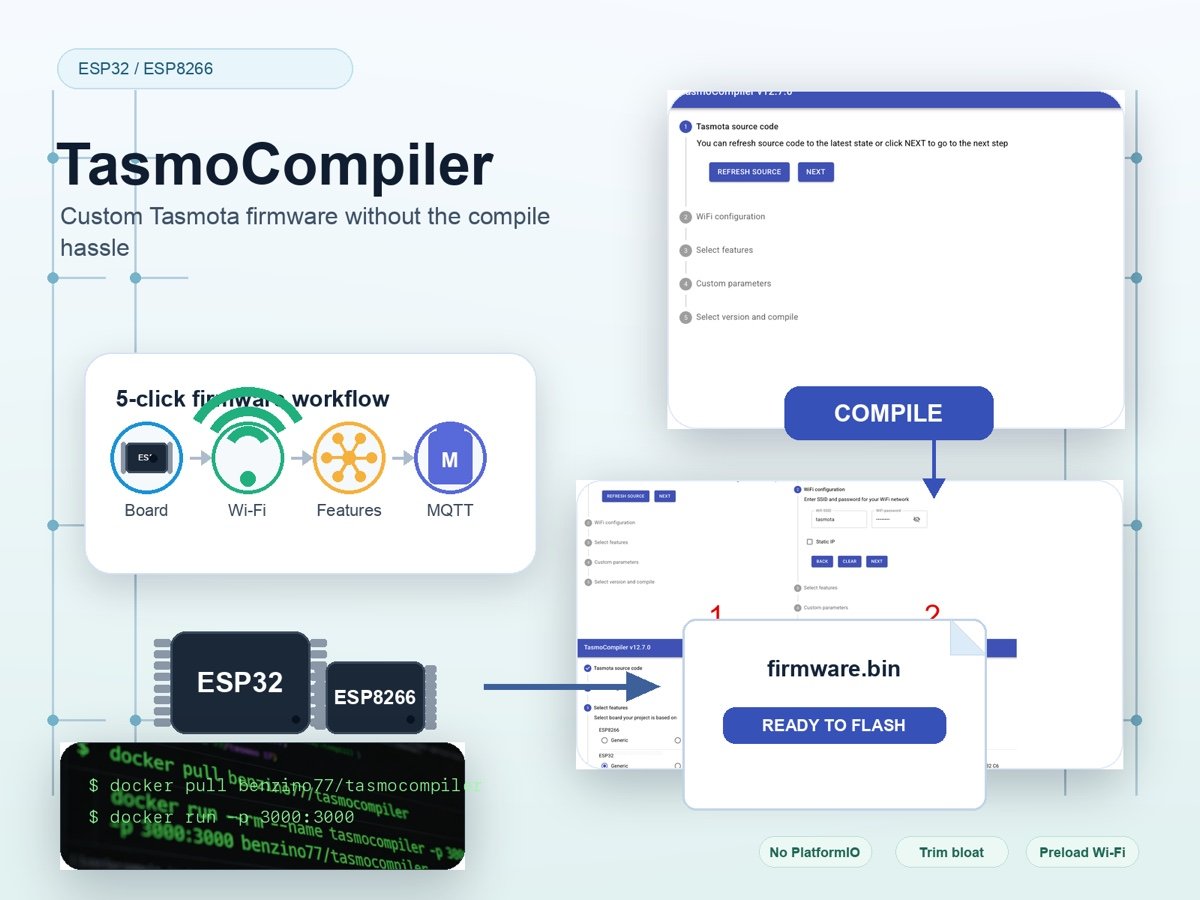
That’s exactly why TasmoCompiler exists. This web-based tool takes all the pain in making custom Tasmota firmware for ESP32 and ESP8266 boards. No local dev setup, no command-line chaos, no confusing config edits. Just click, tell a few details, and get your perfect firmware file in minutes—no PlatformIO required.
What Is TasmoCompiler, Exactly?
This isn’t a whole new firmware—it’s a click-and-get firmware factory built for regular makers who need custom Tasmota firmware for ESP32/ESP8266. It moves the entire compiling process to a backend server (or your own Docker container), so you never have to touch messy development tools on your own computer to build Tasmota binaries. It’s made for people who want to build smart home gear, not debug build environments—and it’s the easiest way to generate custom Tasmota firmware without technical overhead.
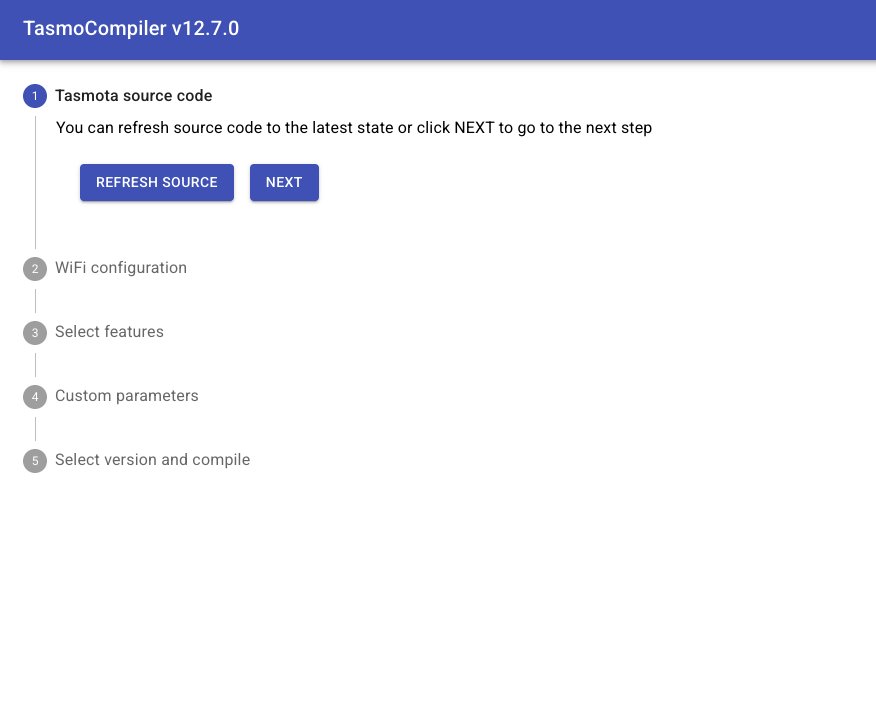
5 Simple Steps to Your Custom Tasmota Firmware
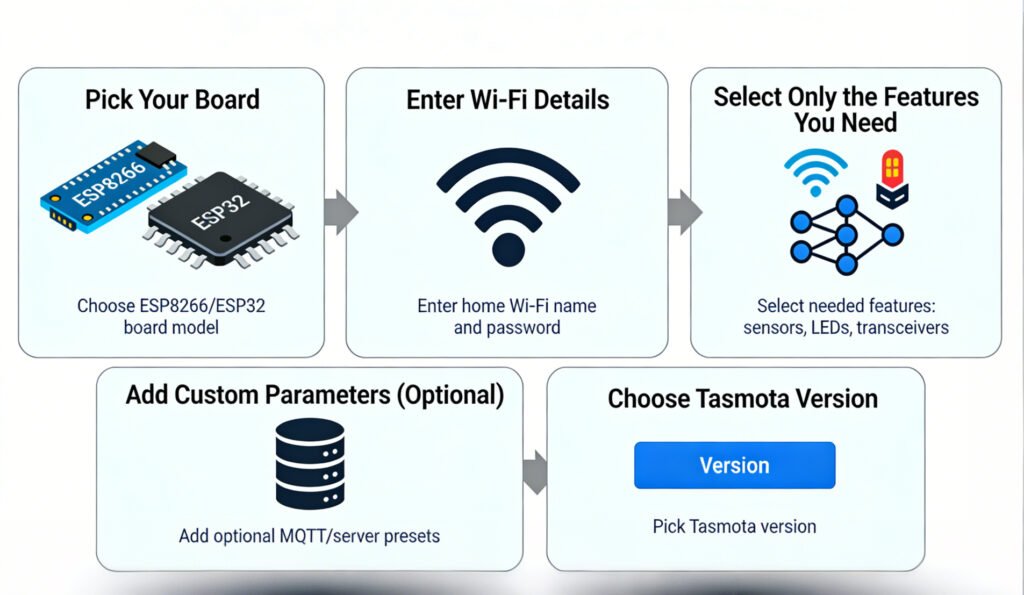
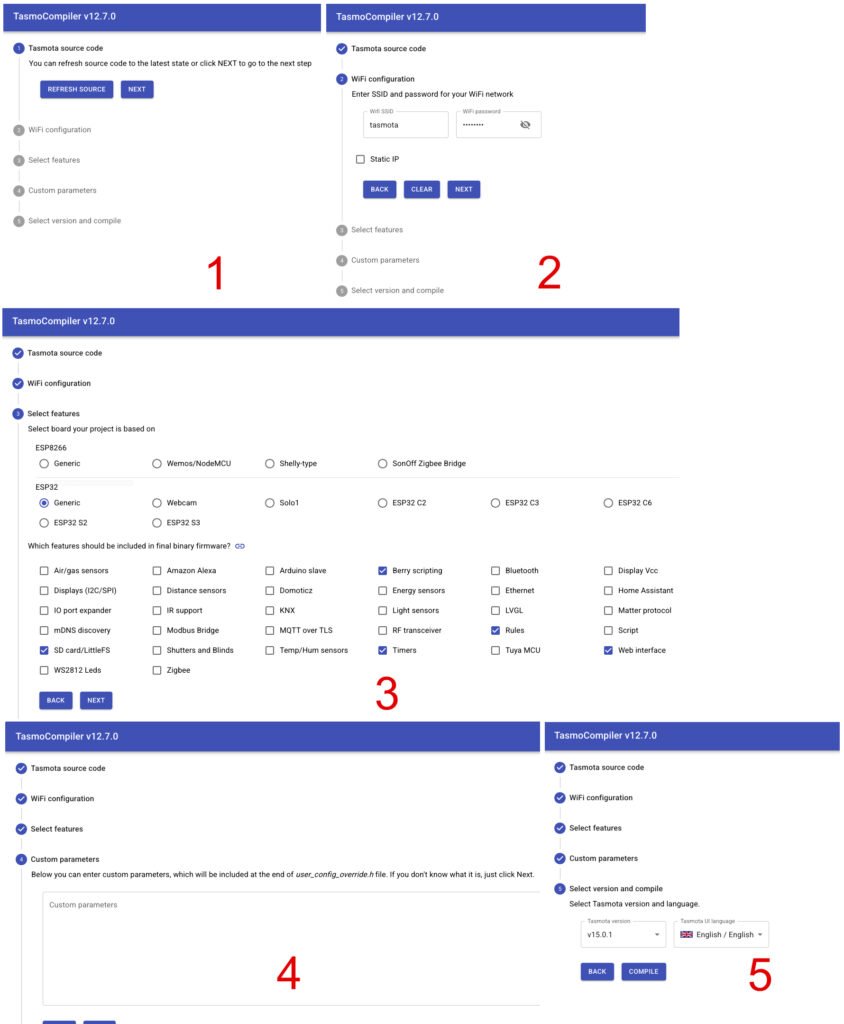
The workflow is super straightforward, designed for hobbyists, not pro developers. Just follow these 5 quick steps, and you’ll have a ready-to-flash binary file for your ESP32 or ESP8266 board:
- Pick Your Board: Choose between ESP8266 and ESP32, then select your exact board model to avoid compatibility issues.
- Enter Wi-Fi Details: Type in your home Wi-Fi name and password. The firmware will auto-connect on boot—no more messing with AP mode setup after flashing your custom Tasmota binary.
- Select Only the Features You Need: Tasmota supports hundreds of sensors and functions, but you don’t need all of them. Check only what you’ll use—Air/gas sensors, WS2812 Leds, RF transceiver, or nothing at all for a tiny, fast bloat-free Tasmota firmware. (Features in detail: https://github.com/benzino77/tasmocompiler/blob/master/FEATURES_DESC.md)
- Add Custom Parameters (Optional): Drop in MQTT server details, device names, or other advanced presets. The tool includes ready-to-use examples, so you don’t have to guess the syntax for your custom Tasmota compile.
- Choose Tasmota Version: Pick stable release for reliability, or dev build if you want the latest experimental features for your ESP32/ESP8266 Tasmota firmware.
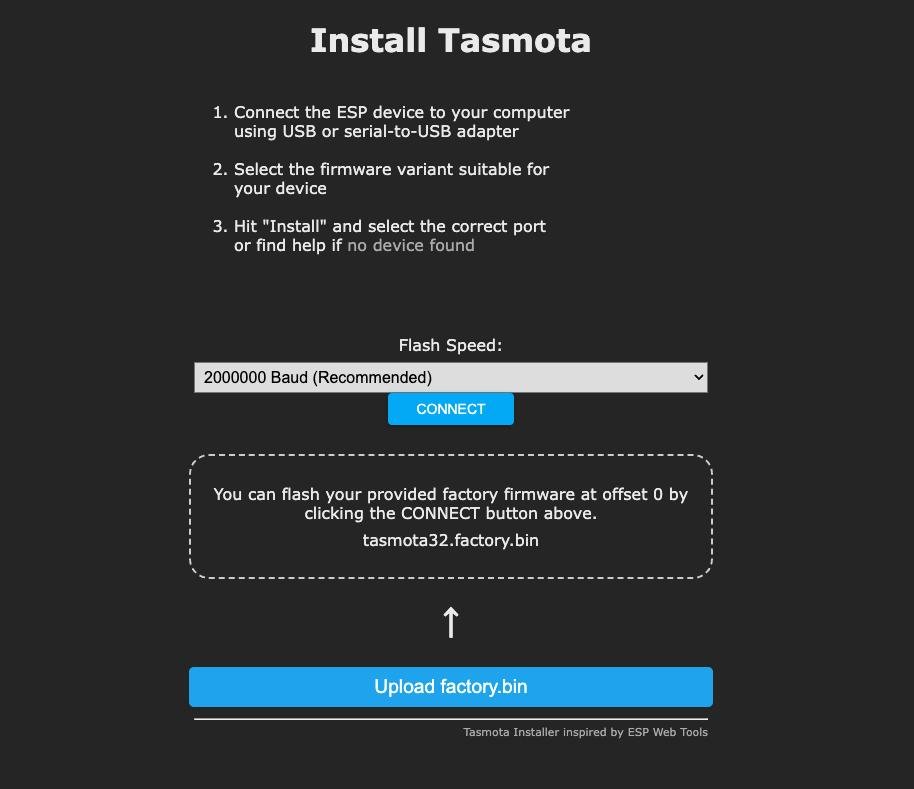
Hit the Compile button, wait 1–2 minutes, and download your firmware. The only file you need is firmware.bin—flash it through the Tasmota web UI or any flashing tool, and you’re done with your custom Tasmota firmware setup.
Two Easy Ways to Run TasmoCompiler
You don’t need to be a Docker expert to use this tool—there’s a hassle-free option for every maker looking to build custom Tasmota firmware for ESP32 and ESP8266:
✅ Docker (Recommended: 2 Lines of Code)
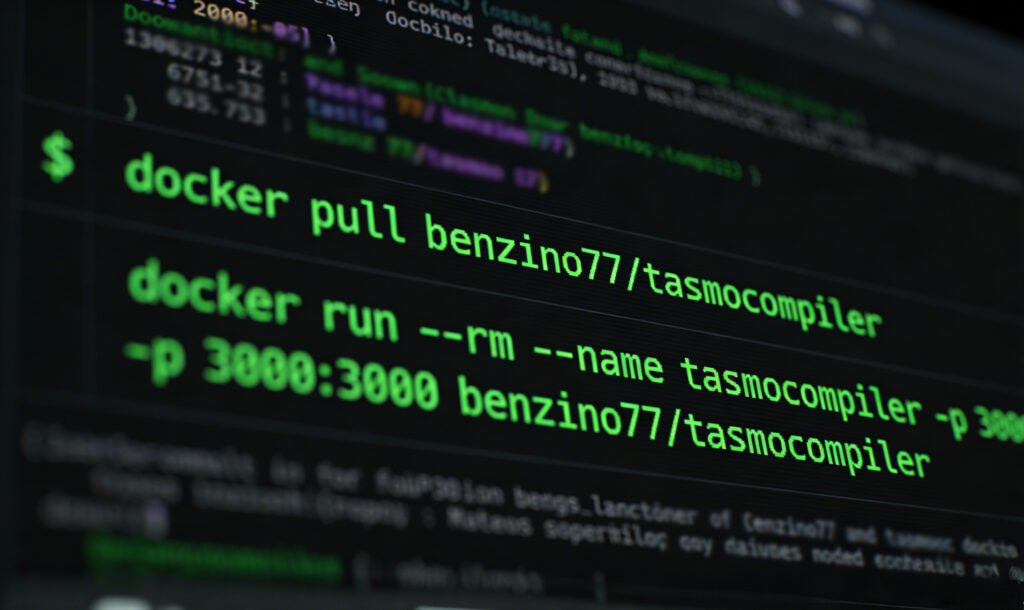
This is the fastest, most reliable method to launch TasmoCompiler and start building firmware. Open your terminal, paste these two commands, and you’re ready to go:
bash
docker pull benzino77/tasmocompiler
docker run --rm --name tasmocompiler -p 3000:3000 benzino77/tasmocompiler
Then open your browser and head to http://localhost:3000 to start building your custom Tasmota firmware. For the cutting-edge dev version, just add “:development” to the end of the image name.
✅ Manual Install (Advanced Users)
If you don’t use Docker, install NodeJS and Python, clone the GitHub repo, and run the tool locally. It’s a bit more hands-on, but gives you full control over your TasmoCompiler setup for custom Tasmota compiles.
- Install NodeJS and Python 3.6.x or later
- Install yarn
- Install platformio
- Clone/download the repository from github and change directory to the cloned repo
- run yarn install
- run yarn build
- run node server/app.js
- point your browser to http://localhost:3000
Who This Tool Is For (And Its Limits)
✅ Perfect For:
- Smart home hobbyists who hate setting up compile environments for custom Tasmota firmware
- Makers who want lean, bloat-free ESP32/ESP8266 Tasmota firmware
- Beginners who don’t know coding but want custom Tasmota firmware for their smart home devices
- Anyone who wants auto-connect Wi-Fi and pre-set MQTT configs in their custom Tasmota binary
❌ Not For:
- Users who need ultra-rare, deep source code modifications for custom Tasmota firmware
- People who want to edit core Tasmota code manually (instead of using TasmoCompiler for streamlined builds)
Final Thought: Spend Time Building, Not Troubleshooting
TasmoCompiler wasn’t built by a big tech company—it was made by a fellow maker who was tired of the compile grind. It strips away all the boring, technical busywork and lets you focus on what actually matters: getting your smart home devices working exactly how you want with tailored custom Tasmota firmware for ESP32/ESP8266.
Grab the GitHub repo, clone and install it, and never manually compile Tasmota again. Your free time will thank you, and your ESP32/ESP8266 smart home projects will run smoother than ever.
Quick Recap
- No local dev setup: Compile custom Tasmota firmware entirely in your browser or Docker container
- 5-click workflow: Build ESP32/ESP8266 Tasmota firmware in minutes
- Pre-load Wi-Fi/MQTT: Zero setup after flashing your custom Tasmota binary
- Trim bloat: Only include features you actually use in your custom Tasmota firmware
- 100% free and open-source TasmoCompiler for all smart home makers