Disclosure: This article reviews an open-source hardware project by lvyiwuhen, “A Filament Dryer with PID Control,” which is a practical FDM 3D printing accessory designed for reliable filament drying with precise temperature control. We aim to share this functional hardware project, which solves a real 3D printing pain point, with the global hobby electronics and 3D printing enthusiast community.
Overview
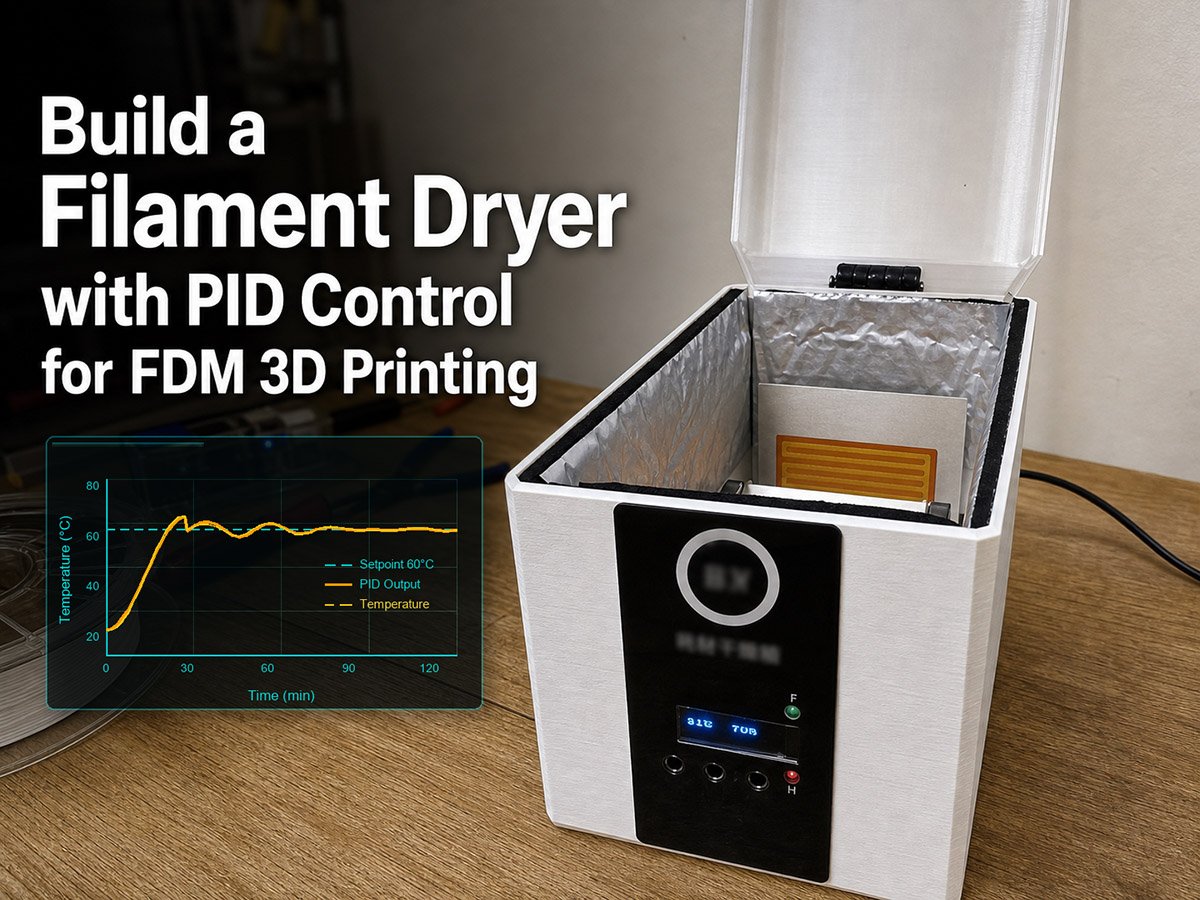
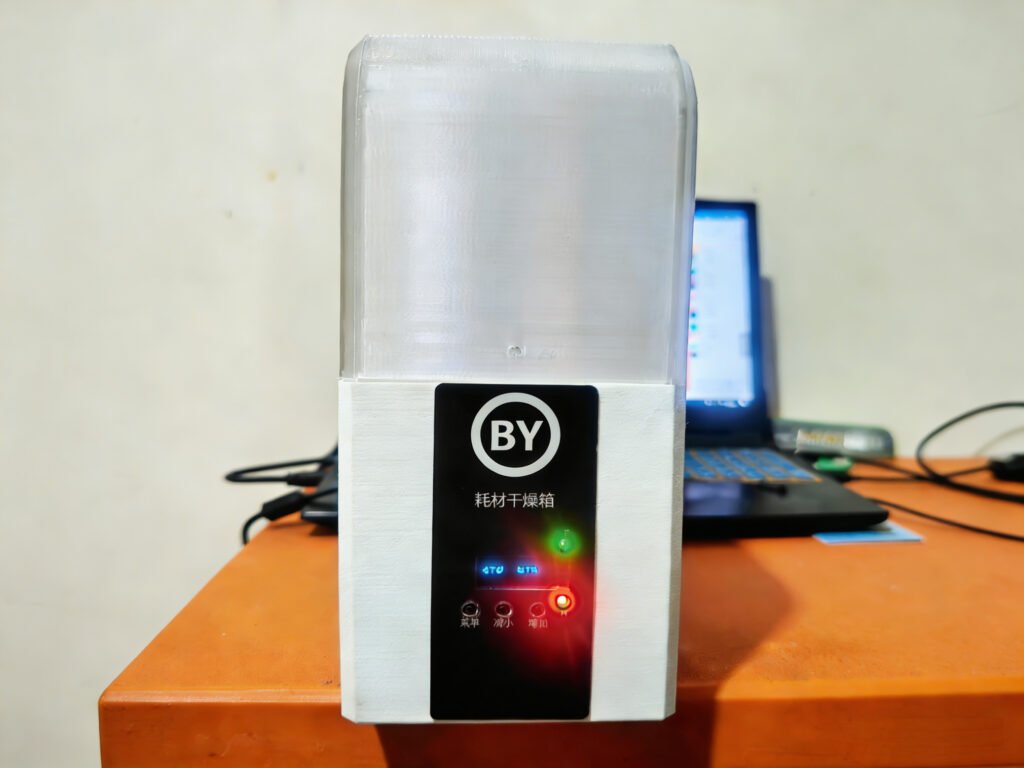
This article introduces the PID-controlled filament dryer, an STM32-based DIY project designed by lvyiwuhen. Built for FDM 3D printing enthusiasts, this project fixes the common issue of poor print quality caused by damp filament with a self-made drying box that uses precise PID temperature control and hot air circulation.
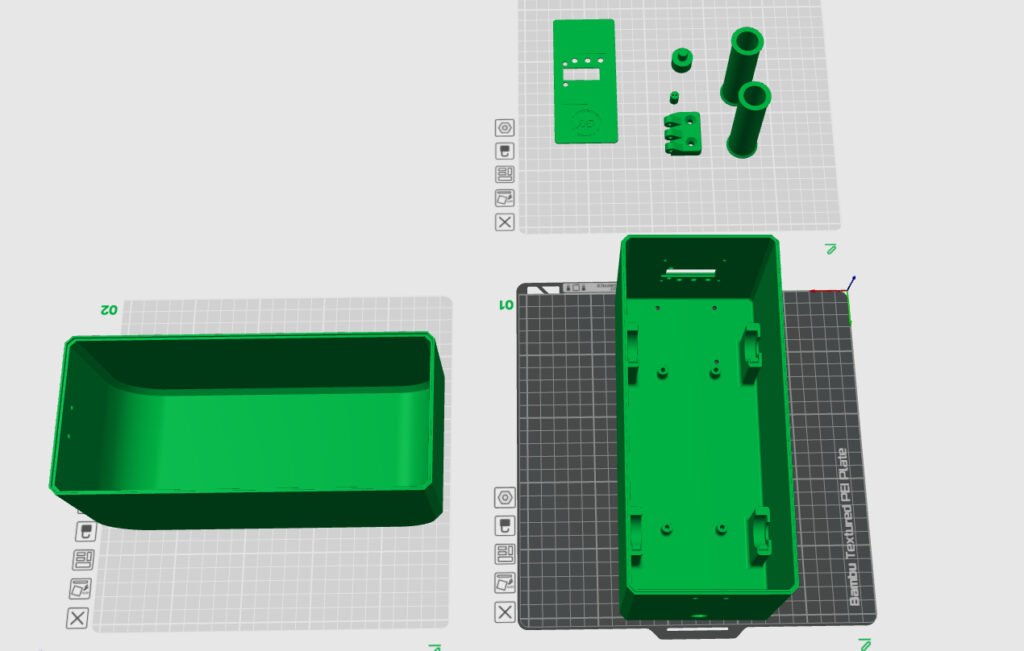
All enclosure and structural parts are 3D-printable, and the firmware can also be repurposed for other heating projects like egg incubators. We’ll walk through its project value, honest cost and build time estimates, core features, building tips, and open-source resources.
Project Value & Key Skills
You get an idea? Then build it with your knowledge, skills, and accessible parts and tools. This project explains that concept clearly. It blends practical 3D printing utility with microcontroller (STM32) technology and PID control, solving a real problem through designing and building. Most other filament storage containers or boxes built in the maker community are passive. They use moisture absorbers to pull moisture away, and you have to replace the absorber later. Now we have an active dryer, which really expels dampness from the filament into the air by means of an electronically (PWM) controlled heater.
It’s a perfect project for 3D printing lovers and electronic device builders who want to learn industrial control basics (PID and PWM) with a functional end product, not just a theoretical demo. Skills or experience you may gain from this project:
- STM32F030F4P6 microcontroller programming
- PID temperature control algorithm and tuning
- AHT30 temperature & humidity sensor interfacing
- PWM control for fan control and heater regulation
- SMT soldering and PCB assembly
- End product assembly with a 3D-printed enclosure and functional hardware parts
- Example of functional PCB design that can work with a 12V, high-current heating device
Cost & Build Time
Based on the creator’s official design, a realistic breakdown for a full build is as follows:
- Total Cost: ~$20 (±$3) (varies by supplier and excludes the cost of 3D-printed parts)
- Build Time: 3–5 hours (includes PCB soldering, firmware uploading, assembly, and initial tests; time for printing the enclosure is not included)
- Difficulty Level: Intermediate (basic SMT soldering, STM32 firmware uploading via ST-Link, and basic knowledge of PID control)
- Software Setup: Medium. Pre-compiled firmware is available for beginners; advanced users can tweak the code to their needs.
Note: Total cost excludes shipping fees, 3D printing filament (PLA/PETG), and enclosure-related materials, like screws, ball bearings, and other hardware parts.
Core Features
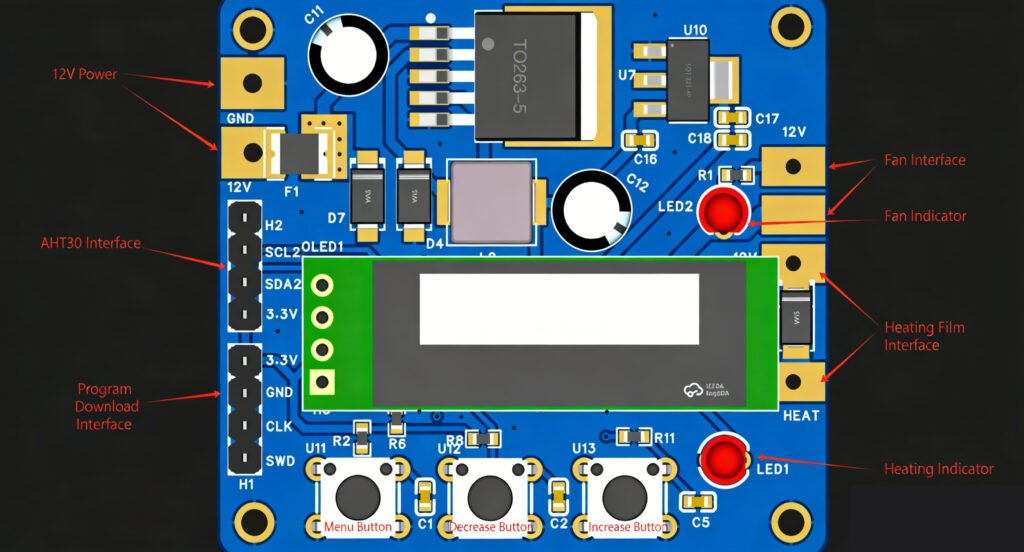
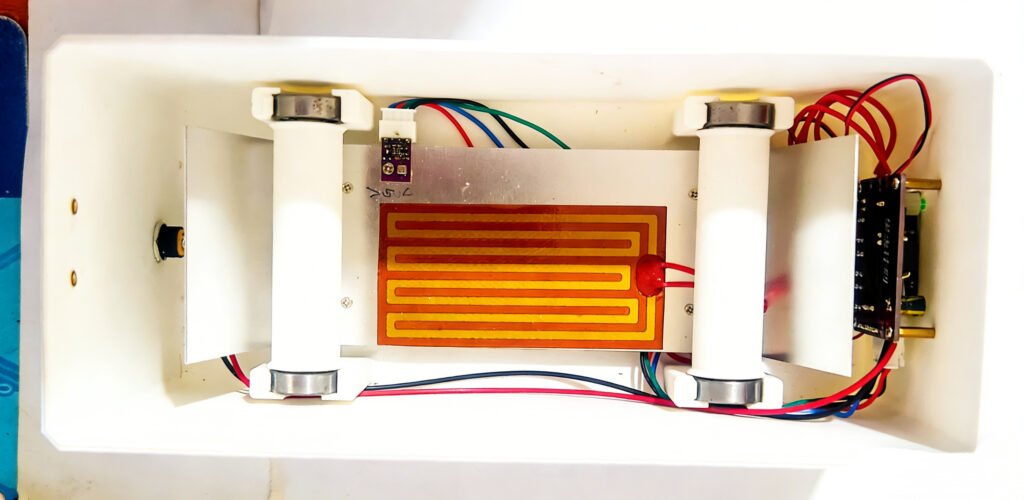
Major Hardware Components
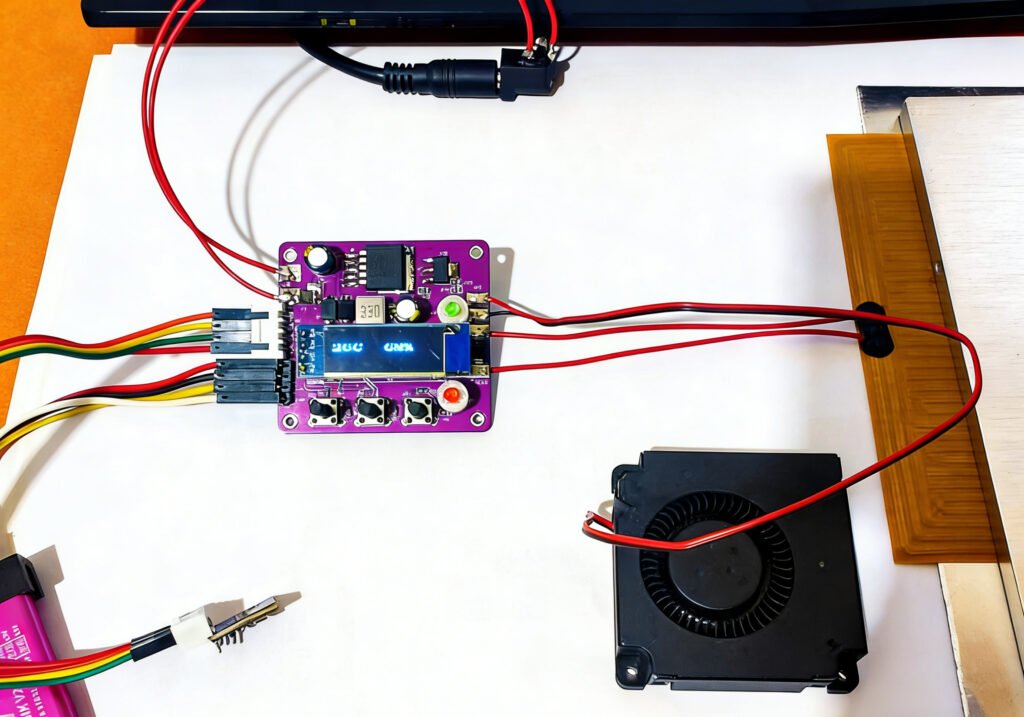
- Main Controller: STM32F030F4P6 microcontroller
- Sensor: AHT30 high-precision temperature & humidity sensor
- Heater: PI Polyimide film heater (12V working voltage)
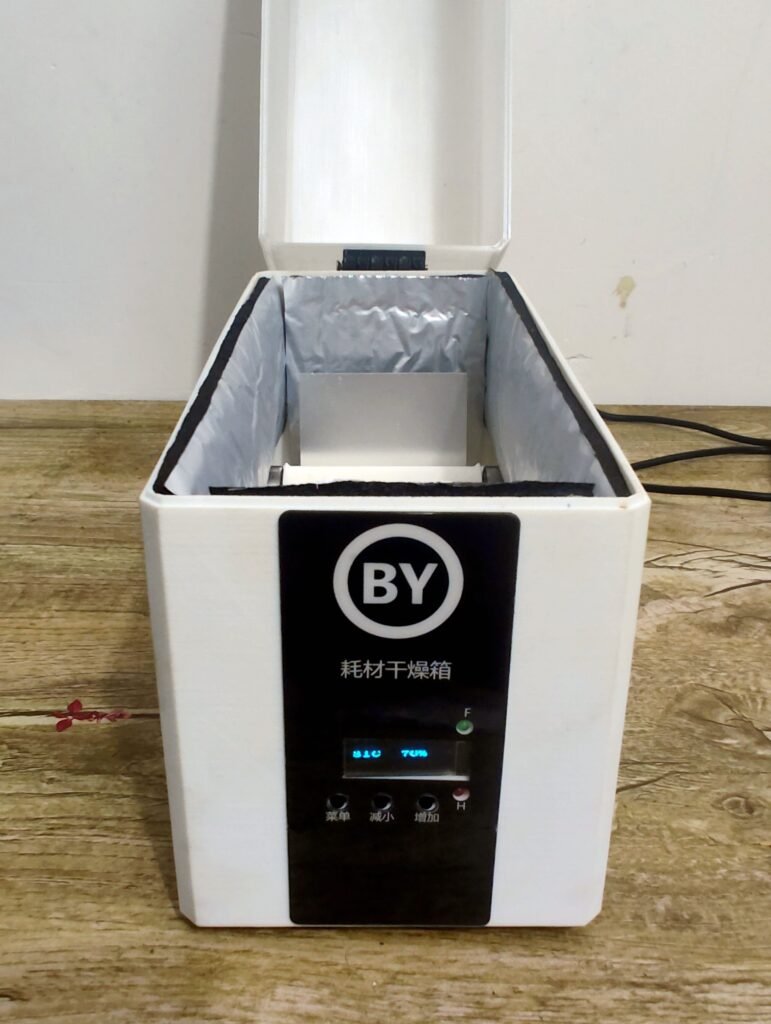
- Display: 0.91-inch OLED screen (128 × 32 resolution)
- Fan: 5010 DC fan (air circulation/ventilation)
- Power Supply: 12V/6A DC power supply
- Controls & Indicators: 3 tactile buttons, red (heating) + green (fan) LEDs
Mechanical Parts: 3D-printed enclosure, aluminum sheet (1mm thickness), insulation sheet for keeping heat inside, ball bearings, screws, etc.
Functional & Design Features
- Precise and smooth PID temperature control
- Built-in 3 preset temperature settings (50°C/60°C/70°C)
- 0-100% PWM adjustable fan speed control (0% = fan off)
- Configurable working hours (0-120 hours, heater automatically shuts down when complete)
- OLED for showing temperature, humidity, working hours, and current status
- LEDs for indicating heating and fan control status
- 12V power supply, simple and easy to source
- Firmware customizable for other heating projects (e.g., egg incubator)
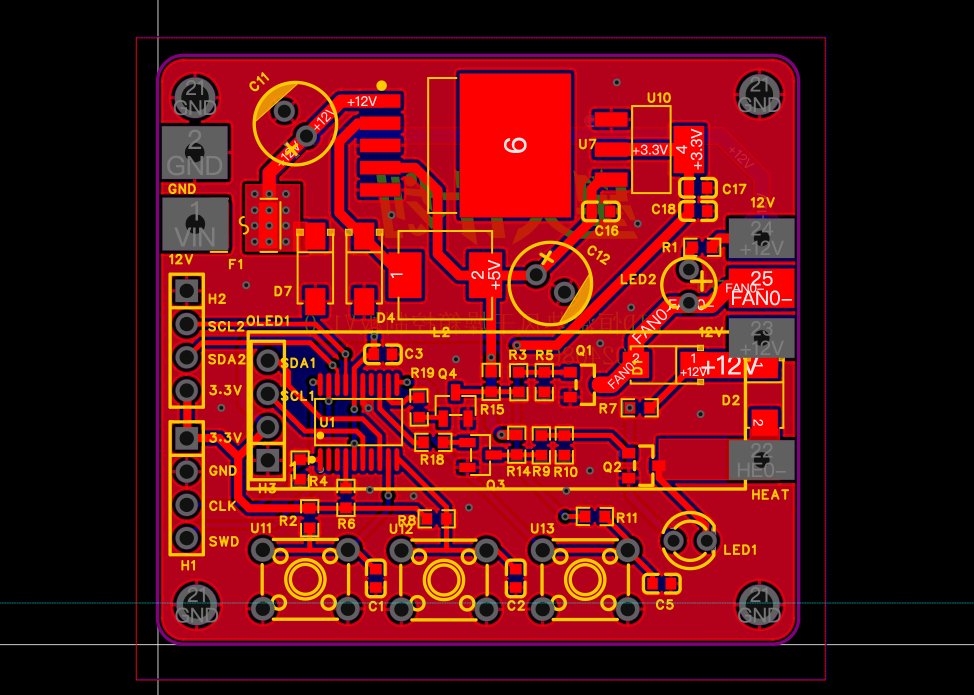
- Full open-source: PCB schematics, firmware, 3D STL files
Tips & Notes
- Diode: Pay close attention to the polarity of diode SS34/SS54 — reverse installation will cause damage.
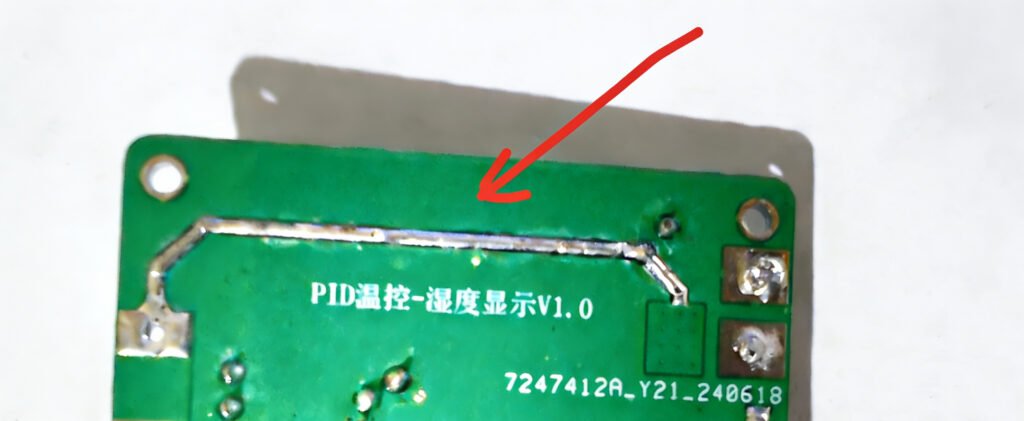
- PCB Trace Current Handling: Add more solder to the PCB traces that go to the external heater in order to handle higher electrical current during operation.
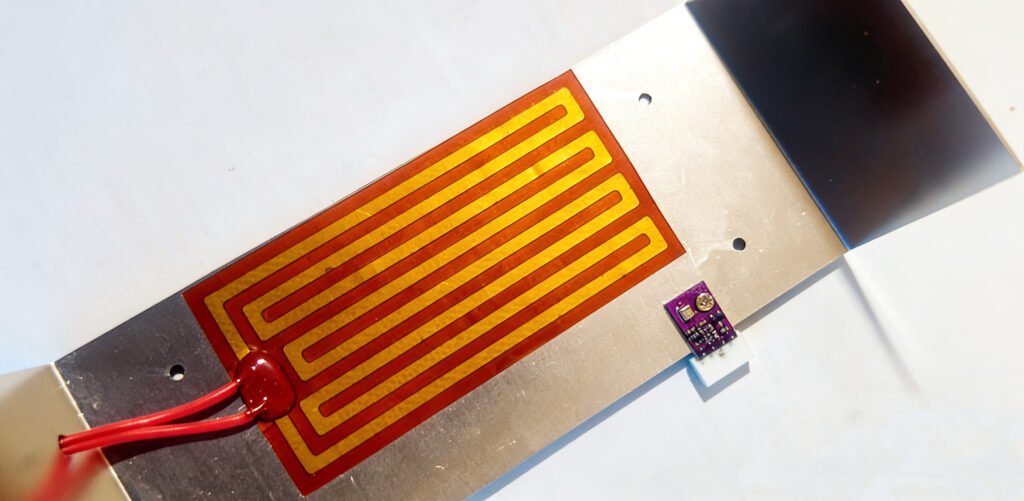
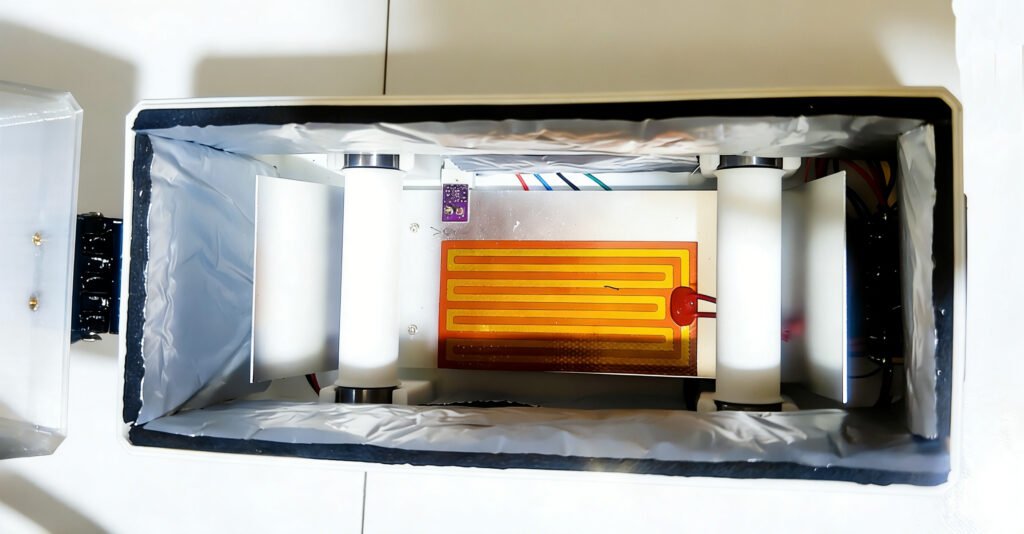
- Film Heater Installation: Mount the PI film heater to an aluminum sheet for better heat distribution; dual films are supported for higher-power drying. You have to buy an aluminum sheet (1060), then cut, fold, and drill it by hand. The dimensions could be around 300mm x 200mm x 1mm.
- Heat Insulation: Line the 3D-printed case with insulation material to keep the heat inside and improve heating efficiency.
- Acrylic Panel Sheet: It’s optional; you could order it from LCSC or just have it printed on sticker paper.
- Drying Hours: My settings: PLA 50°C (≥12h), PETG 65°C (≥8h).
Open-Source File Sources
OSHWHub Project Page: https://oshwhub.com/lvyiwuhen/3d-printer-pid-constant-temperat (PCB files, 3D STLs, BOM, videos, firmware)
The Final Word
This filament dryer project is highly valuable for FDM 3D printing lovers and makers. It solves the widespread problem of filament failure with a low-cost, customizable solution that outperforms existing passive filament storage solutions. The build is accessible for makers with basic soldering and microcontroller skills, while also teaching practical PID control and embedded design skills. All project files are available, and the finished product is a must-have tool for consistent 3D printing. With modifiable firmware, it also offers extra value for repurposing into other heating control projects.
Copyright Notice
This article is an original review of the 3D Printer PID Constant Temperature Hot Air Dry Box project designed by lvyiwuhen (original project: https://oshwhub.com/lvyiwuhen/3d-printer-pid-constant-temperat). The original project is licensed under CC BY-NC-SA 4.0 license. All images used are credited to lvyiwuhen without modifications.