Disclosure: This is an independent introduction to SmartChamber-3D by maker ‘physton’. I am not the author of this project. The goal is to help makers decide whether it is worth studying, adapting, or building.
Overview
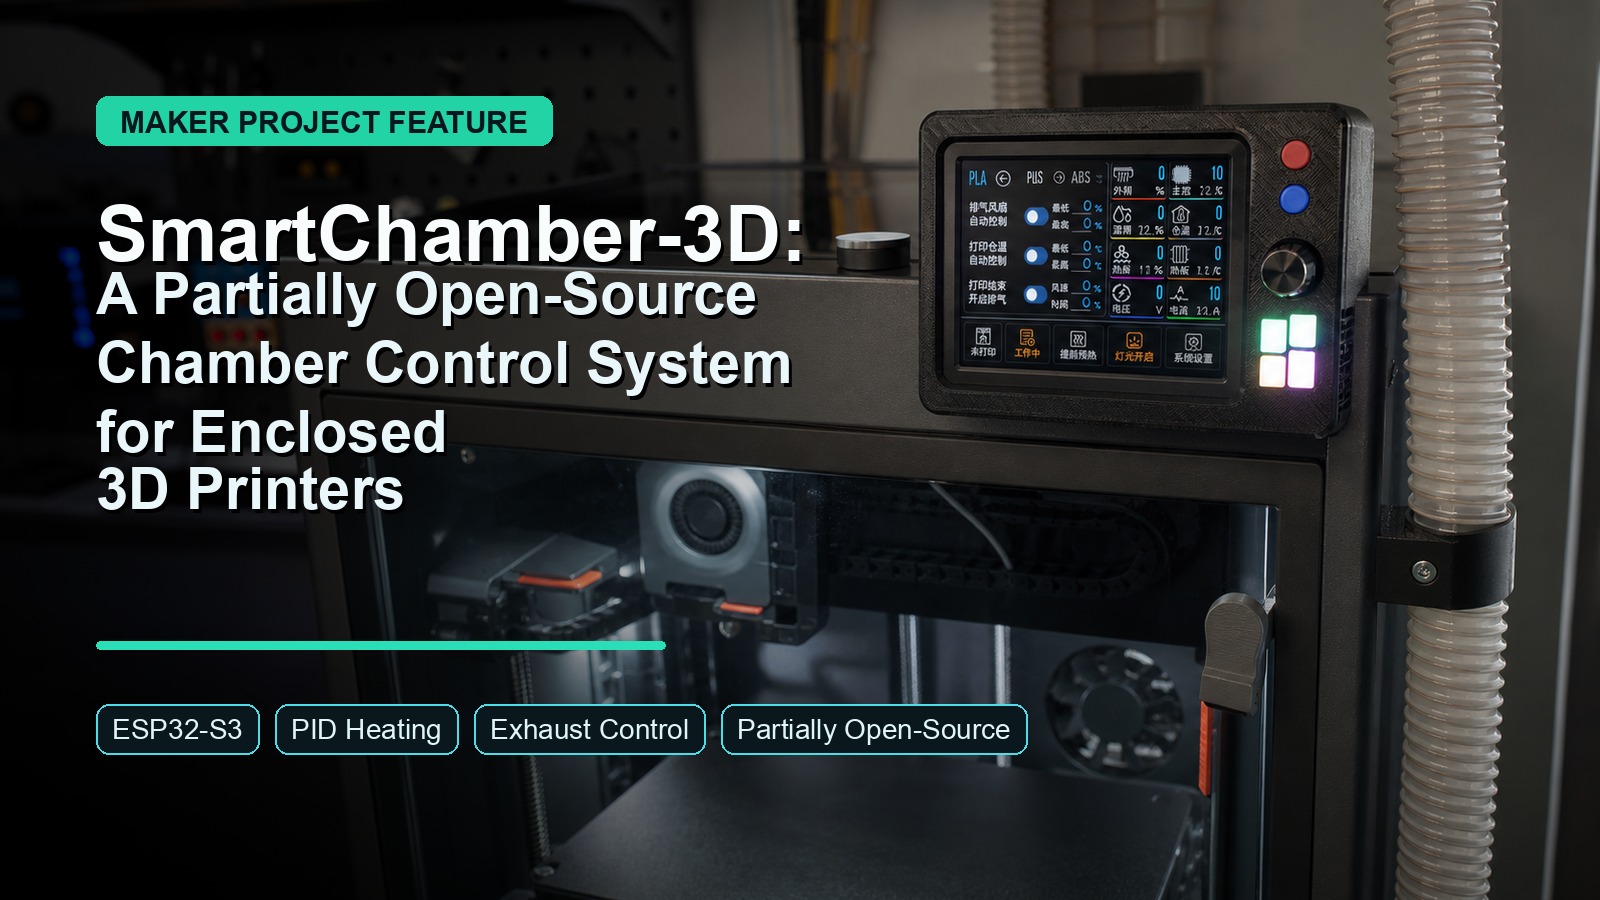
SmartChamber-3D is a chamber temperature control system for enclosed Bambu Lab P2S or P1S 3D printers. According to the OSHWHub page, it provides chamber heating and harmful-gas exhaust for enclosed printers, not i3-style open-frame machines.
It sounds narrow, but it is practical. Chamber temperature matters: too cold, and engineering filaments may warp or fail; too hot, and PETG or PLA can become more prone to hot-end issues.
SmartChamber-3D is more than a manual heater box. It can detect printer state, run PID chamber heating, control exhaust airflow, and return to standby after printing.

Why This Project Is Worth Noticing
Most 3D printer upgrades focus on speed, flow rate, bed adhesion, or filament drying. Chamber control gets less attention, even though it directly affects material reliability.
SmartChamber-3D focuses on two practical needs:
- Keeping the chamber warm enough for sensitive materials.
- Exhausting enclosure air during or after prints where ventilation matters.
The system can start and stop based on printer activity, watching the print environment instead of adding another manual switch.
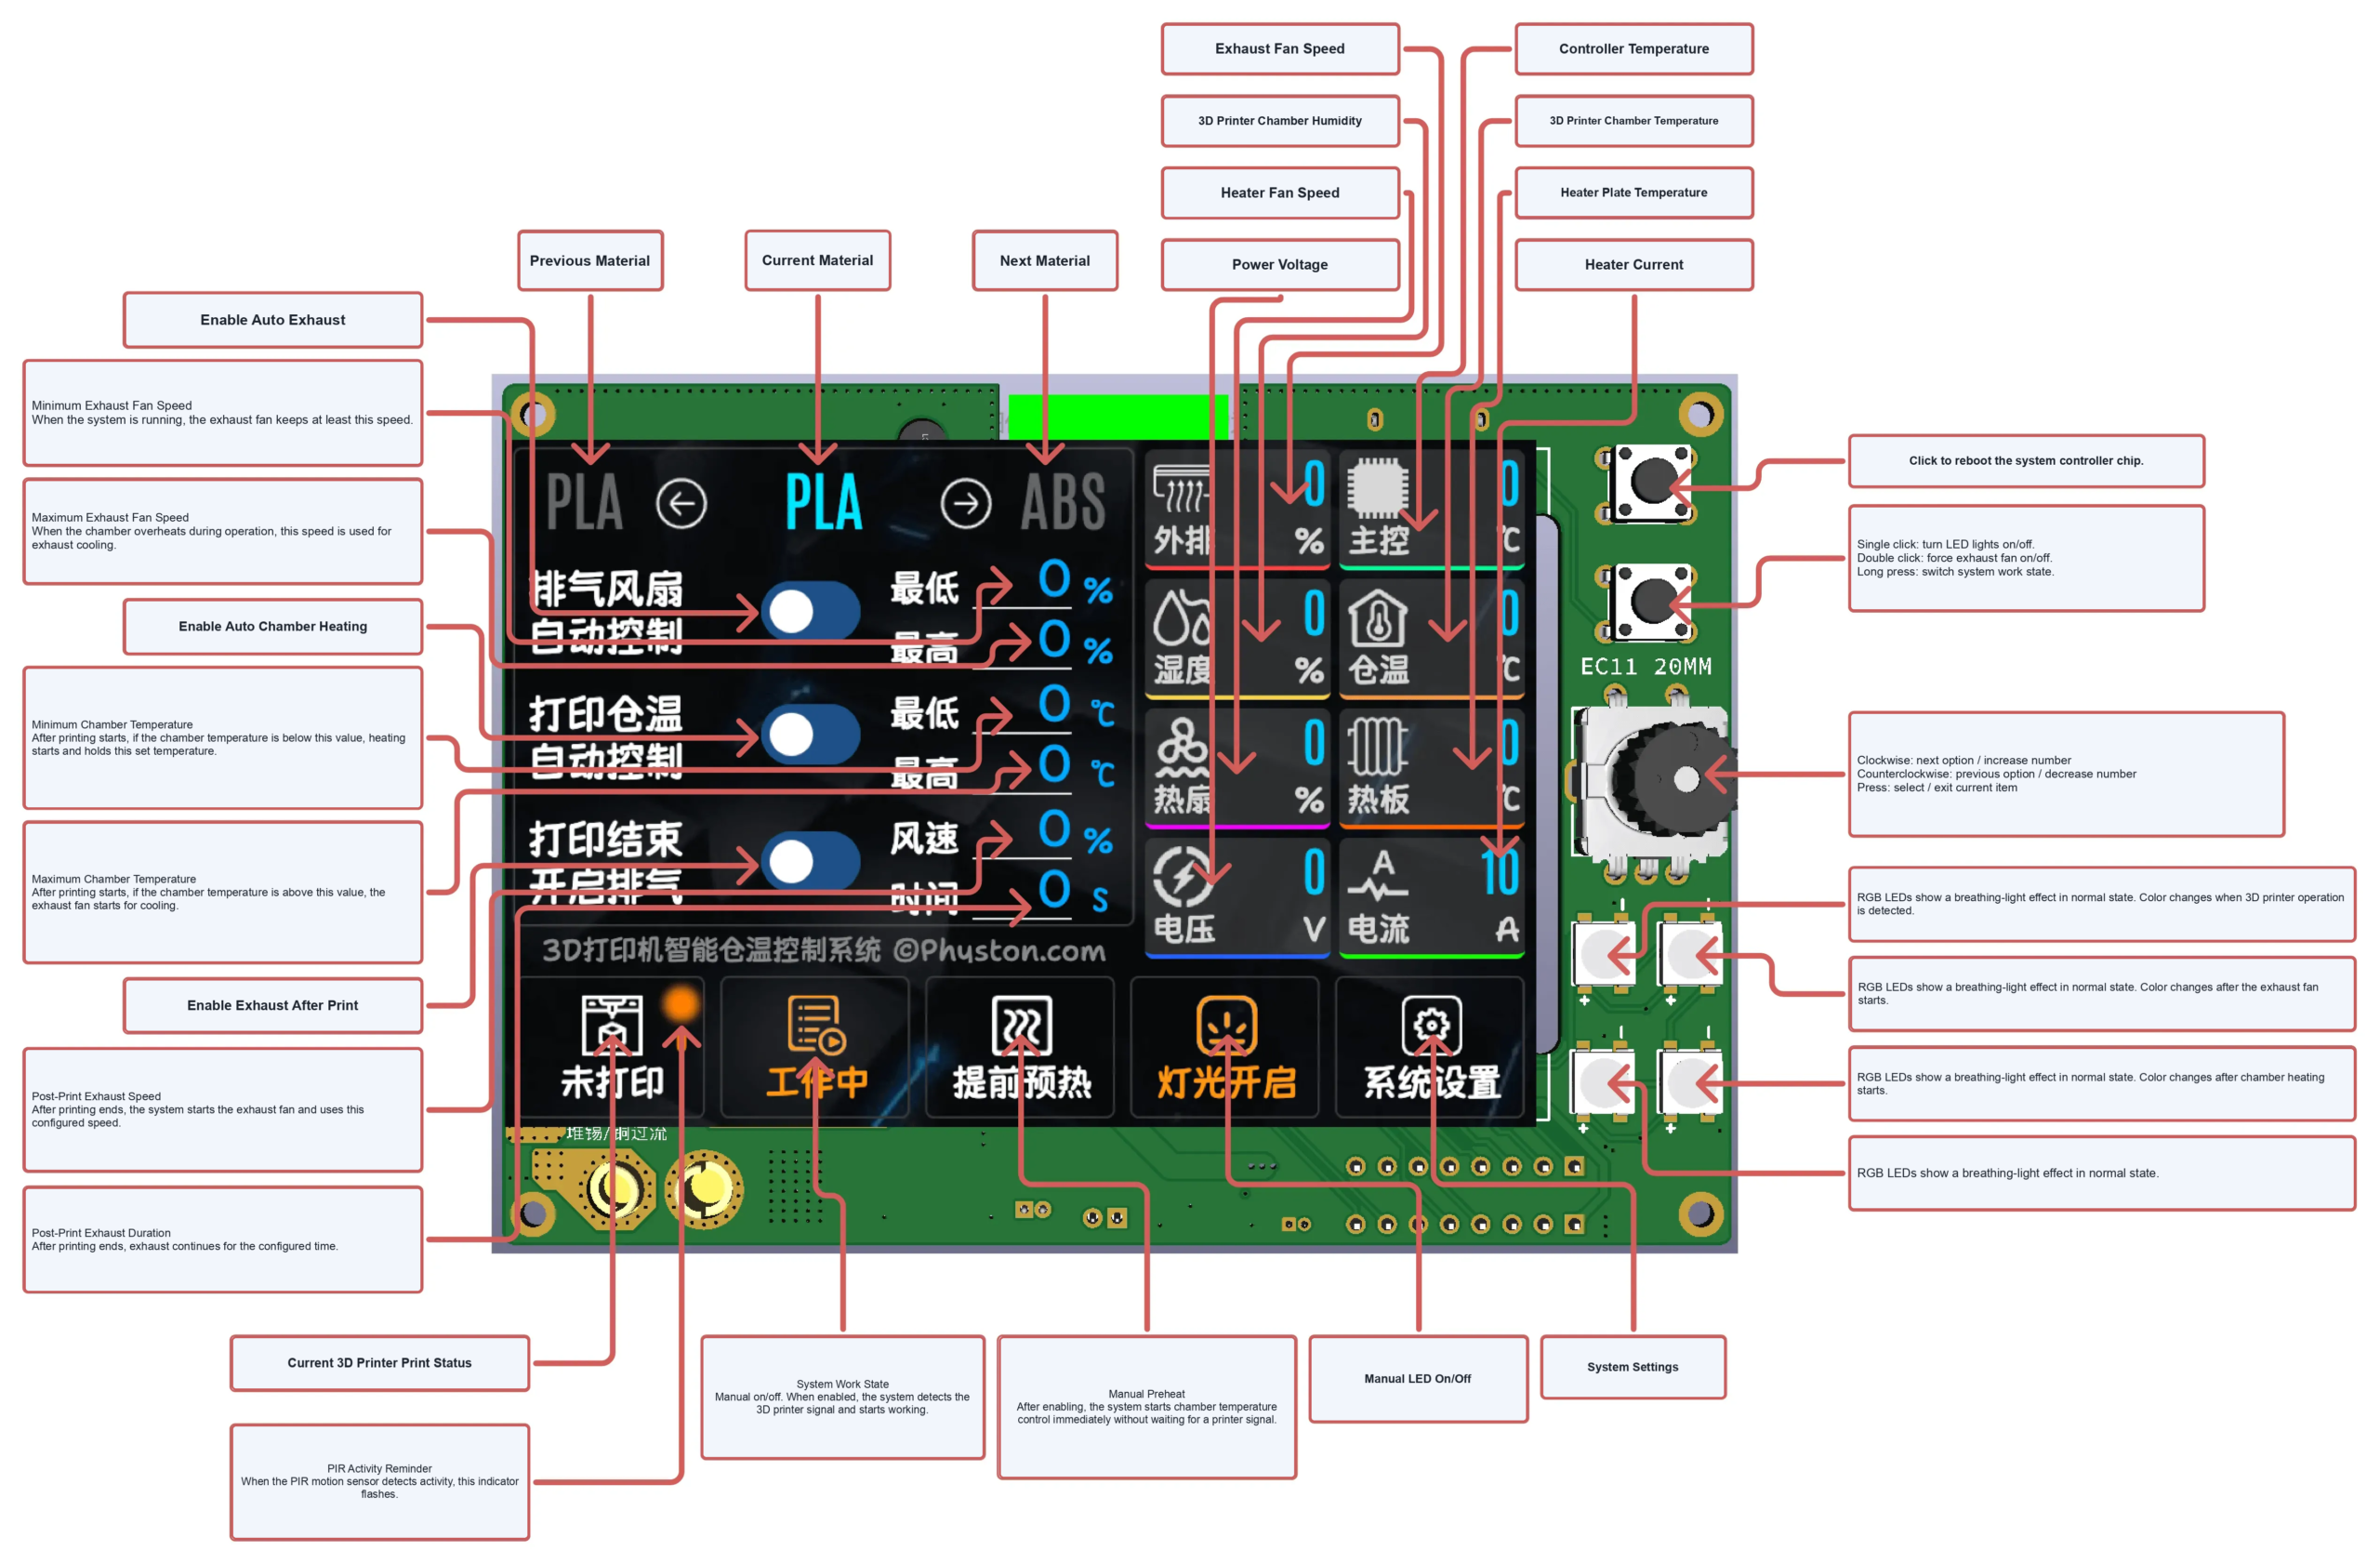
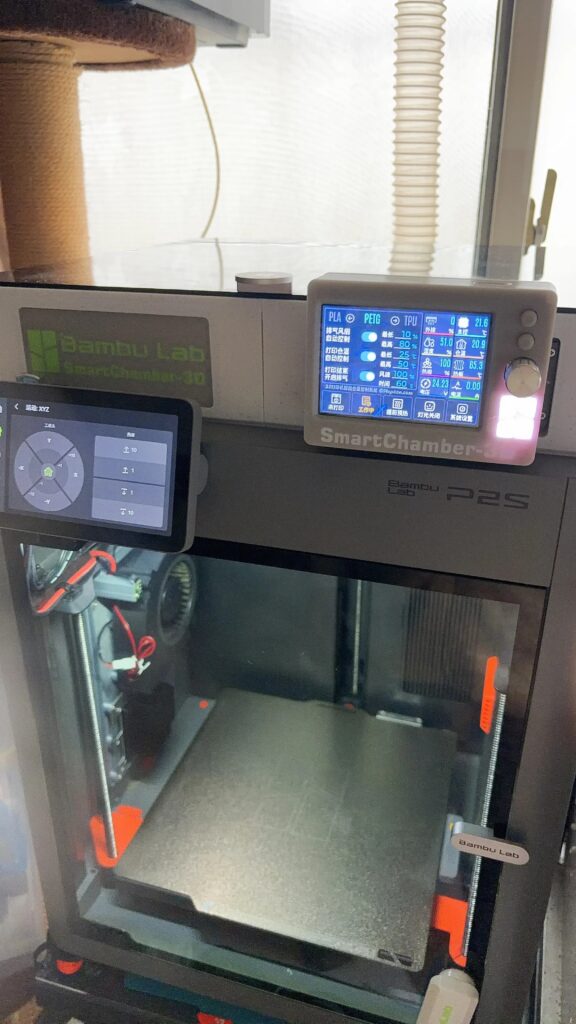
My favorite detail is the balance between automation and physical control: a 3.5-inch resistive-touch TFT plus an EC11 rotary encoder.
Skills You Can Learn
Because the public firmware package does not include source code, the learning value is mostly hardware and integration focused:
- ESP32-S3 module selection and board-level integration
- 24V DC power distribution for a mixed logic/control system
- MOSFET-based heater and fan drive circuits
- Higher-current wiring, connector selection, and polarity checking
- TFT display, resistive touch, and EC11 encoder integration
- PIR sensor placement and printer-state detection setup
- Heater board, exhaust fan, LED strip, and sensor wiring
- 3D-printed modular enclosure design
- PCB/BOM review and assembly planning
- Safe testing habits for heater and fan control hardware
Hardware Deep Dive
The system is built around an ESP32-S3 module. The BOM recommends at least 8MB of flash, with ESP32-S3-WROOM-1-N8 as the minimum practical option and PSRAM variants preferred.
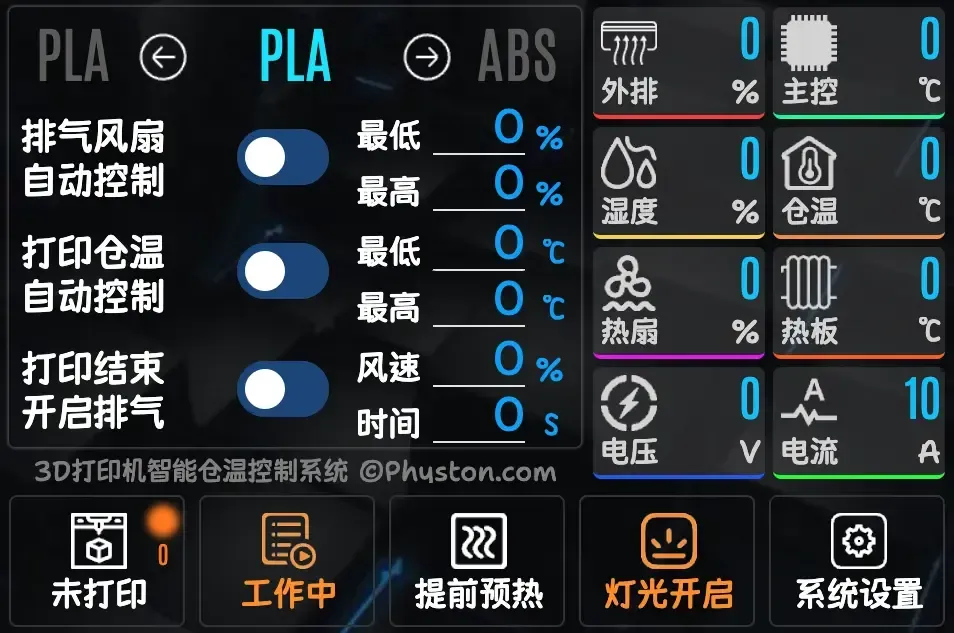
For the interface, SmartChamber-3D uses a 3.5-inch ST7796 TFT display at 480 x 320. It supports resistive-touch or non-touch screens, but not capacitive touch. The EC11 encoder gives builders a second control method.
Power is based on a 24V DC supply, entering through an XT60 connector and feeding the main controller and heating board. The heater side is serious: the project mentions up to 24V 12A heating using an aluminum PCB heater board.
The docs also call out low-RDS(ON) NMOS choices and suitable capacitor voltage ratings. This is a higher-current heater build, not just a low-power sensor project.
Note: The TFT GUI in this screenshot is Chinese because the original image uses the Chinese interface. The project page says SmartChamber-3D supports Chinese and English UI; the V1.0.6 firmware binary also contains English strings such as “System Language,” “Please choose your language,” and “English.”
Control Logic and Daily Use
Daily use is simple: select the material profile, then set the system to ready.
When the printer starts, a PIR infrared module detects activity and begins chamber control. If the chamber is too cold, PID heating works toward the selected material target. If it is too hot, the exhaust fan pulls the temperature down.
The project can heat while exhausting at low airflow, then run stronger exhaust after printing. That coordination is better than manually switching a heater and fan.
Cost and Build Difficulty
The OSHWHub page lists the replication cost at around CNY 200, roughly USD $30, for a display, ESP32-S3 controller, power hardware, sensors, wiring, PCBs, and printed parts.
I would place this as an upper-intermediate maker build.
- Total Cost: around CNY 200, depending on sourcing and printing choices
- Difficulty Level: Upper-intermediate
- Build Time: several hours for soldering, wiring, flashing, printing, and testing
- Software Setup: Moderate, because firmware files are provided, but flashing and activation are still required
- Mechanical Setup: Printer-specific, especially if your enclosed printer is not a Bambu Lab P2S or P1S
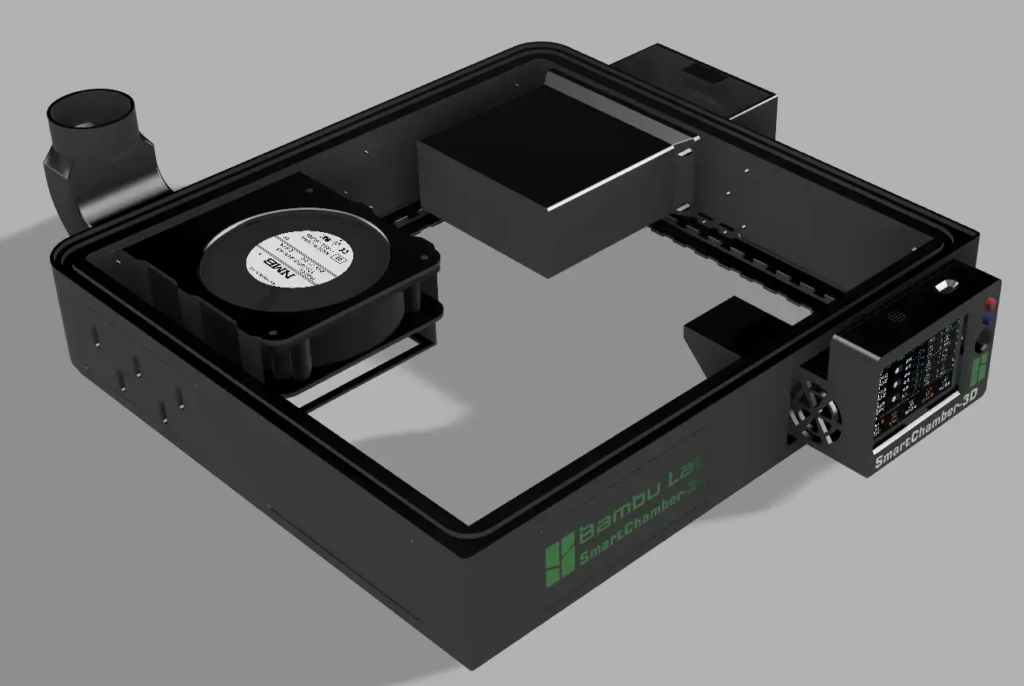
The 3D-printed model is designed for Bambu Lab P2S and P1S printers. Other enclosed printers will likely need custom mechanical adaptation.
Build Tips and Warnings
This project deserves careful wiring. The docs recommend connecting signal lines and sensors first, then fans and LED strips, and finally 24V power and the heater board.
Key things to watch:
- Do not reverse fan polarity.
- Do not reverse the 24V power input.
- Use wire gauges appropriate for current draw.
- Pay attention to MOSFET current and thermal requirements.
- Use suitable voltage ratings for capacitors on 24V-related circuits.
- Keep the heater wiring clean and mechanically secure.
- Test the system carefully before leaving it unattended.
The BOM recommends 15AWG or 16AWG for power wiring and 24AWG for signal wiring. This build mixes logic-level electronics with real power delivery.
Open-Source Value
SmartChamber-3D provides docs, PCB production files, BOM, firmware downloads, wiring diagrams, 3D module files, and FAQ. The project is licensed under CC BY-NC-SA 4.0 on OSHWHub.
Important caveat: SmartChamber-3D appears to be only partially open-source. Hardware docs, PCB resources, BOM, wiring information, and 3D module files are available, but the firmware package contains compiled .bin files, not firmware source code. I could confirm English UI strings in the binary, but could not review or modify the firmware source.
The firmware also uses an activation-code mechanism to prevent commercial misuse. The docs say personal DIY users can get free activation codes with no usage limits.
Project File Sources
Original OSHWHub Project: https://oshwhub.com/physton/3d-da-yin-ji-cang-wen-kong-zhi-xi-tong
Main Documentation: https://3d.physton.com/zh-cn/
PCB Production Files: https://3d.physton.com/zh-cn/hardware_production.html
BOM: https://3d.physton.com/zh-cn/hardware_bom.html
Firmware Download: https://3d.physton.com/zh-cn/software_download.html
Wiring Diagram: https://3d.physton.com/zh-cn/hardware_wiring_diagram.html
3D Module Source Files: https://3d.physton.com/zh-cn/3d_module_source_file.html
FAQ: https://3d.physton.com/zh-cn/faq.html
The Final Word
SmartChamber-3D is a serious 3D printer accessory for makers who want better chamber control than a passive enclosure can provide. It is especially interesting if you print engineering materials or want to see PID control, fan control, display UI, and 24V power hardware working together.
It is not a beginner build, and the heater current deserves respect. Still, it has real value: practical documentation, modular printed parts, and a control system that solves a real 3D printing problem.
For the right builder, SmartChamber-3D is more than another printer mod. It is a compact lesson in desktop manufacturing environment control.
Copyright Notice
This article is an independent introduction to SmartChamber-3D by ‘physton’. The original project is available at https://oshwhub.com/physton/3d-da-yin-ji-cang-wen-kong-zhi-xi-tong and is licensed under CC BY-NC-SA 4.0. Project images should be credited to physton and used according to the original license.